
As we explained in a previous post, WA Web Plus can act as a smart agent on your behalf, that processes the incoming messages and does custom actions with them; in this post, we will cover the details that help you set up your first Webhook with only a few steps!
Since version 4.6.7, we started supporting more trusted automation services that WA Web Plus now can integrate with:

We also included the option to receive webhook requests from outside WA Web Plus, making it able to send WhatsApp messages to your contacts directly from your website, web, or mobile application.
1- Outgoing Webhooks
Connecting WA Web Plus with External Automation Services
Below is a list of detailed tutorials that explain how to do this integration simply:
Integrate WhatsApp with Pabbly Connect via WA Web Plus
Integrate WhatsApp with Zapier via WA Web Plus (Soon)
Integrate WhatsApp with Integromat via WA Web Plus (Soon)
Integrate WhatsApp with Integrately via WA Web Plus (Soon)
Integrate WhatsApp with KonnectzIt via WA Web Plus
Setting Up Your Custom Webhook
In case you’re not using any of the above services, or in case you have your own service that you want to integrate with, you can set up your own webhook. To set up a custom webhook, you will need to use Firebase as a service in the middle between WA Web Plus and your system, Firebase is a platform managed by Google now, it provides the ability to host NodeJS applications where you can put your Webhook codes, or connect to your custom server or cloud system.
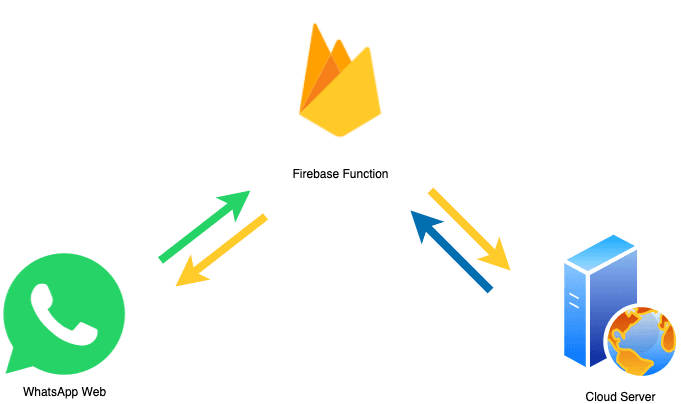
Webhooks are triggered by Smart Replies, when a user sends a specific keyword to your WhatsApp chat, a Smart Reply catches it, and sends all the message information to a previously selected Webhook that will process it and return the reponse to the sender.
Why Firebase?
Due to security restrictions, a static domain should be whitelisted in the extension in order to allow WA Web Plus to send the data to it, we chose Firebase because it is easy to set up, and provides a free service, or a very cheap service if you go over quota. So we’ve whitelisted the most used Firebase services domains to allow users to host their own Webhook code on Firebase.
1- If you are not a developer and you don’t have enough programming skills, you probably didn’t understand some of the terms in this post, sit back and let us do it for you, you can hire our dedicated team to set up your customized Webhook to do whatever you want it to do.
2- If you’re a developer, prepare your Caffeine source; it’s time to code!
Writing the First Webhook
Create your own basic Firebase Cloud Functions app, you can easily build an app that uses NodeJS to receive the request from WA Web Plus, simple documentation about how to make your first app is here on this link, available in 7 different languages.
Deploy your code to the Firebase cloud.
After a successful deployment of your code to Firebase cloud, your endpoint/webhook link can be easily accessed with your browser on the following link: https://us-central1-your-project-name.cloudfunctions.net
Or if you’re using the simple setup with ExpressJS, you can use Firebase Hosting to trigger the function where your link might look like: https://your-project-name.web.app/
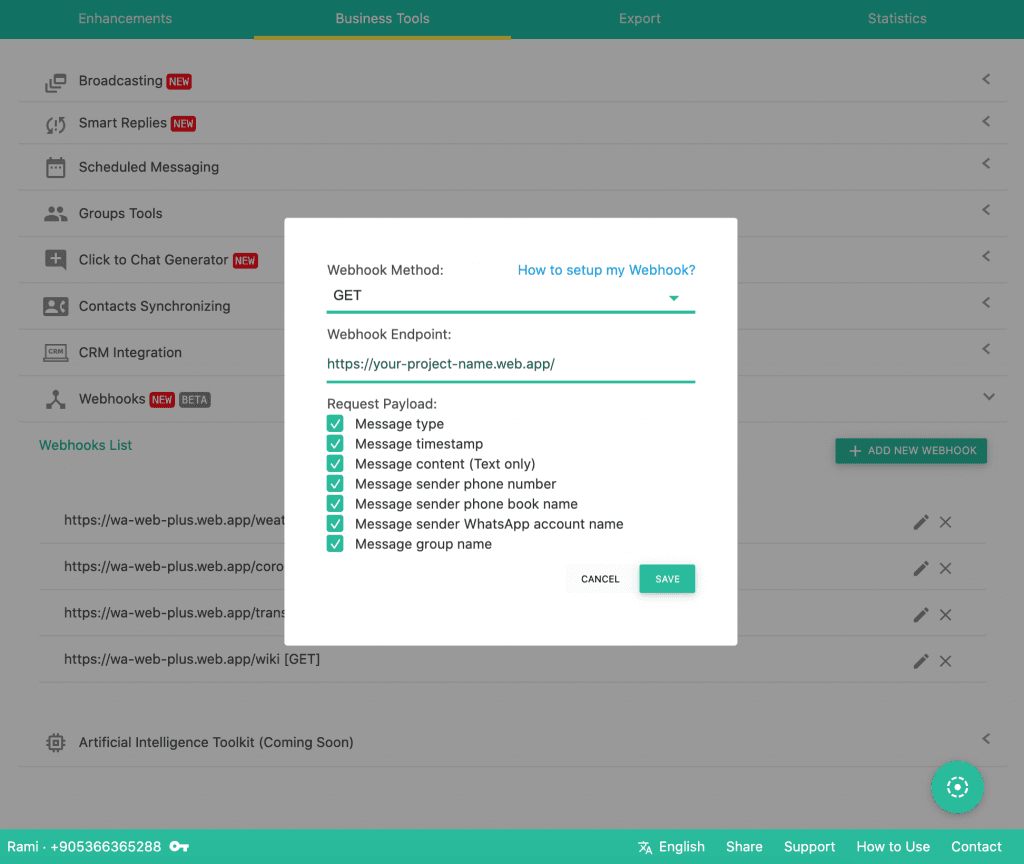
We’re almost there! Now head to WA Web Plus, in the Business Tools tab you can set up a new Webhook, paste your endpoint/webhook link that we created above into the box, select the Request Payload (parameters) that you wish to send to your endpoint, and hit “SAVE”.
Now your Webhook is ready, and waiting for the action that will trigger it! This is easily done with “Smart Replies“, a smart reply detects previously identified keywords in the incoming messages and reacts with a specific action according to it, and our action here will be to trigger a Webhook!
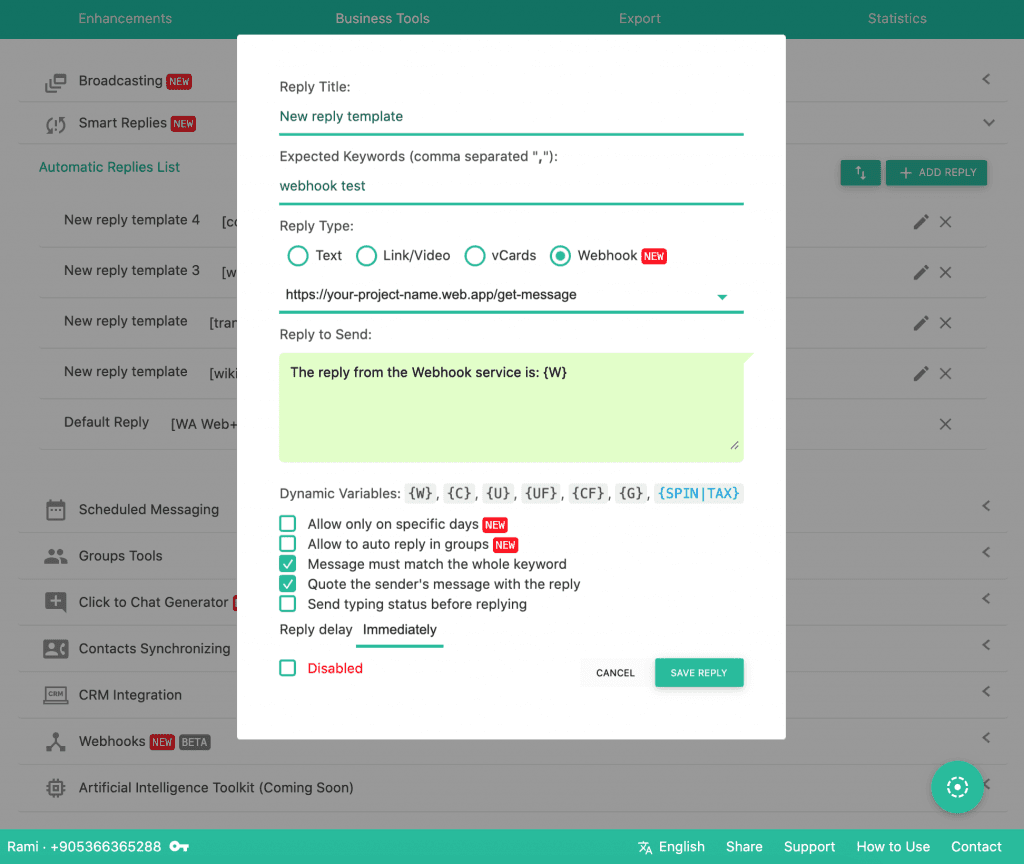
Since the reply will not always be a static reply, but a dynamic one (according to the response from your Webhook endpoint), we will always use the Dynamic Variable {W} to print out the result of the Webhook response to the reply that will be sent to the user.
Now, that’s it! Let us test how the setup goes:
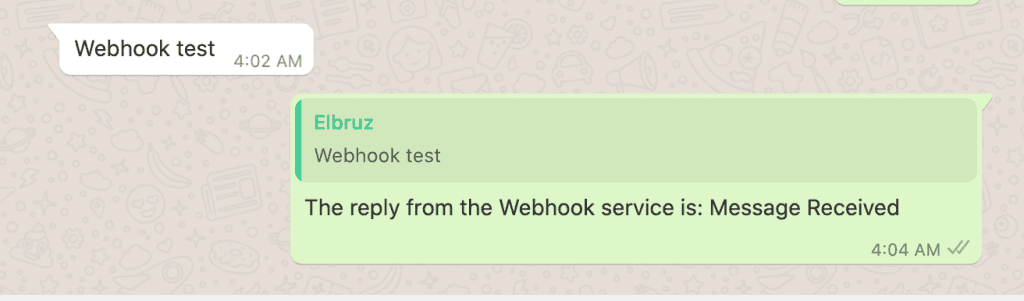
Congratulations! You’ve just made your first Webhook with a very small amount of codes. As you can see in the above image, a user sends a keyword to your WhatsApp, the Smart Reply triggers the Webhook, and the Webhook returns the reply to the conversation.
Going Deeper
But hey, what if I want my Webhook to get information from another server/data provider? That is very easy to do with “Axios” library.
We used “Axios” to send another “GET” request to a service provider that will auto-correct the received message for us, and return it to the user.
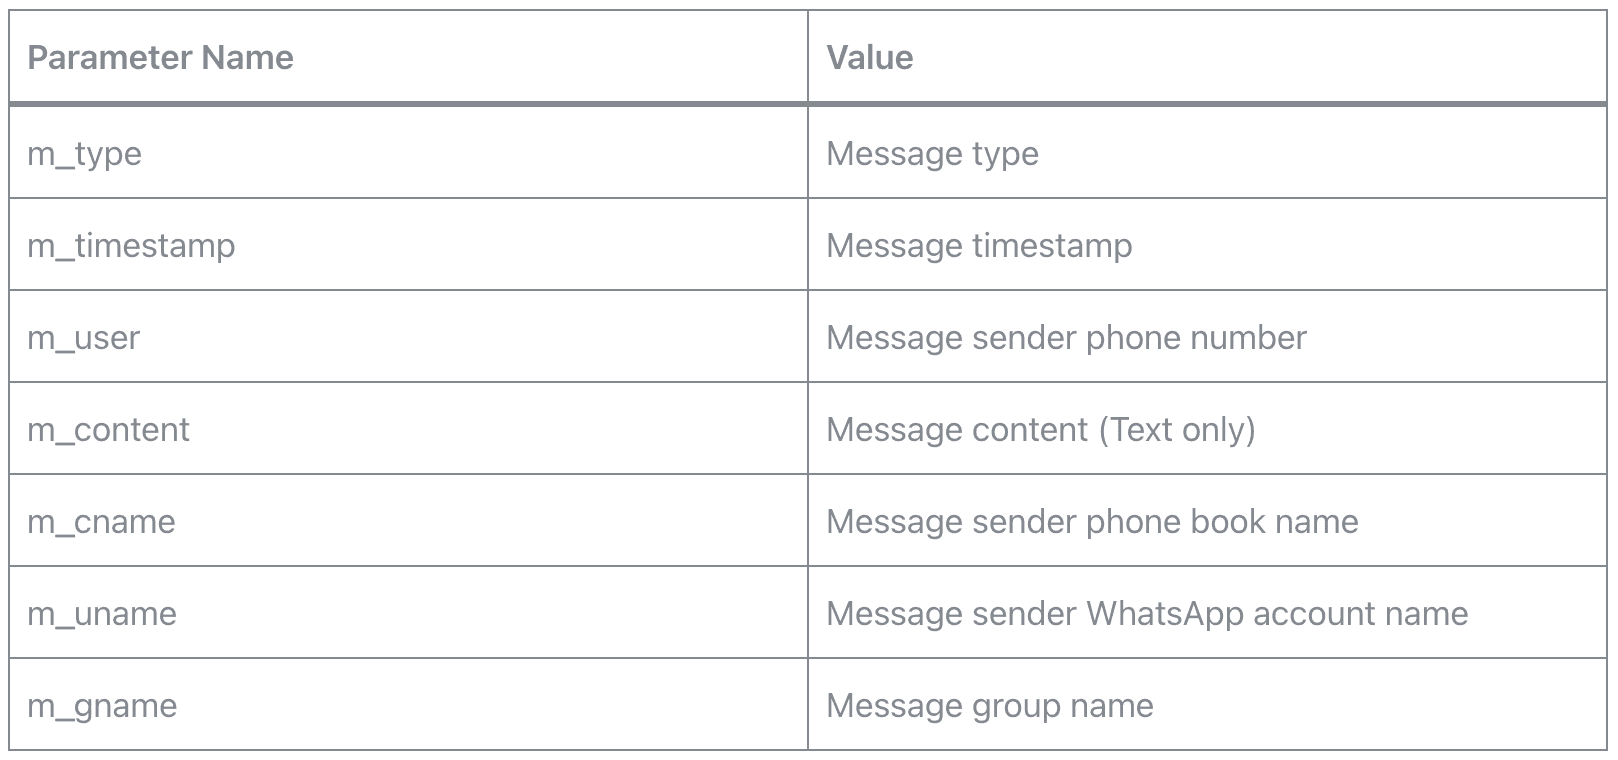
Available Parameters
The Webhook request can send a pre-selected list of variables that includes useful information about the message that has been received. This makes it easy for you to receive the data from those parameters and process them in your Firebase app.
Allowed/Whitelisted Domain Names
Only the list of domains below are allowed to interact (send/receive) data from/to WA Web Plus upon setting up your webhook.
More Examples
Now that you have learned how to set up your first Webhook with WA Web Plus, you can easily replicate those simple Webhooks and play with them:
Google Translate Webhook
A function that uses Google Translate to translate the incoming message to any language.
Covid-19 Statistics Webhook
A function that will return Covid-19 official statistics about any country.
Weather Webhook
A function that returns today’s weather conditions for any given country or city.
Wikipedia Webhook
A function that will return a short description of any information on Wikipedia.
2- Incoming Webhooks
To send data to your customers directly from your website or web/mobile application, WA Web Plus uses Firebase as a real-time processor for incoming requests, it’s easy to set up, and it will become even easier a few versions later when we get rid of Firebase and connect directly to WA Web Plus. However, you have to deal with Firebase Realtime Database for now.
Setting up the Realtime Database:
Go to console.firebase.google.com and set up a new project with any name you choose. Note down the slug that you see below the name beside the pencil icon, this is your project ID and we will need to use it later.
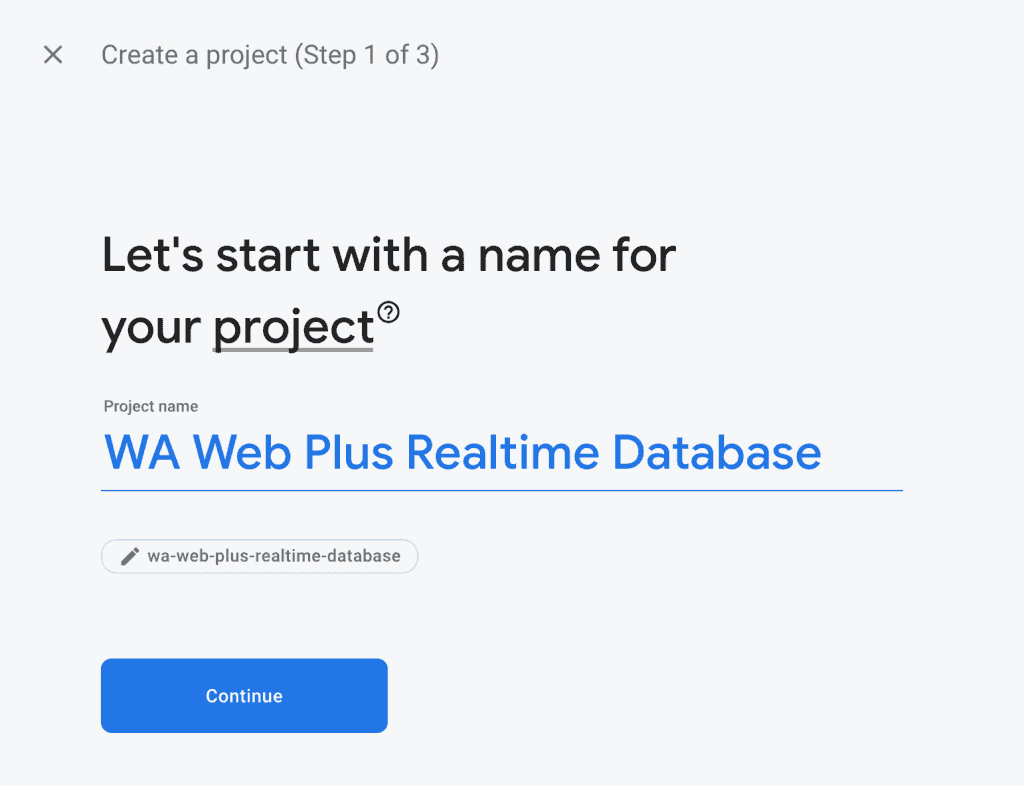
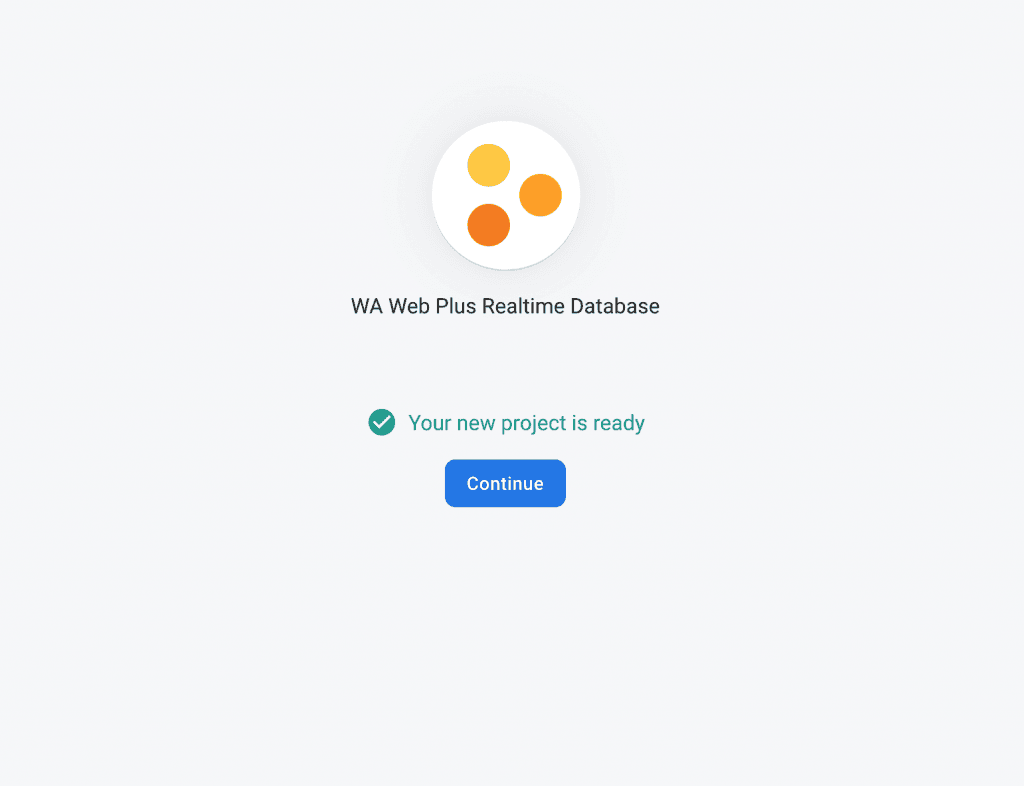
Follow these 3 simple steps to create the project, once your project is ready, click “Continue”.
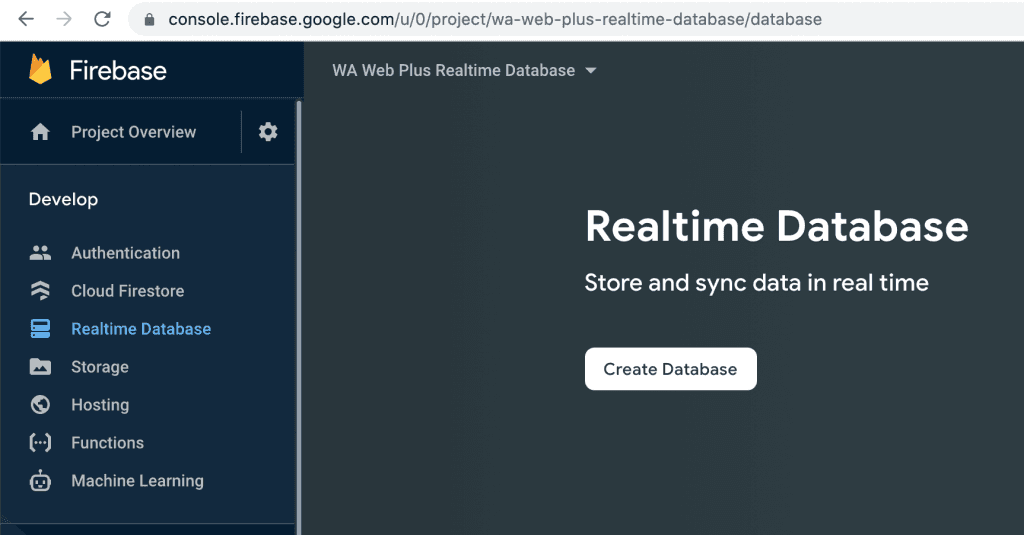
On the left sidebar, click “Realtime Databases” and then click the “Create Database” button.
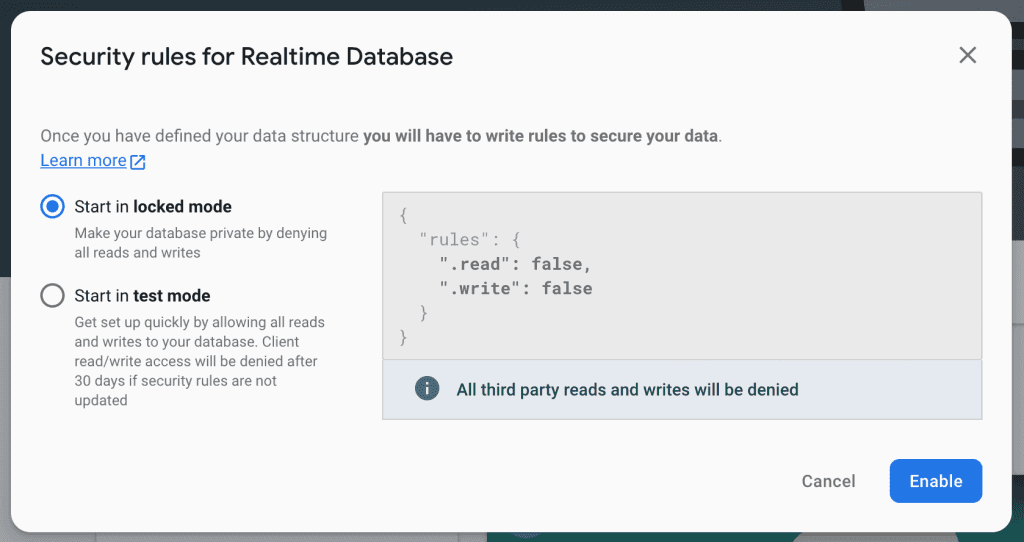
When creating the Database, you will be asked about the security rules of your database, click “Enable” and let’s move to the database “Rules” tab to change them from “false” to “true”, so that the connections can go through.
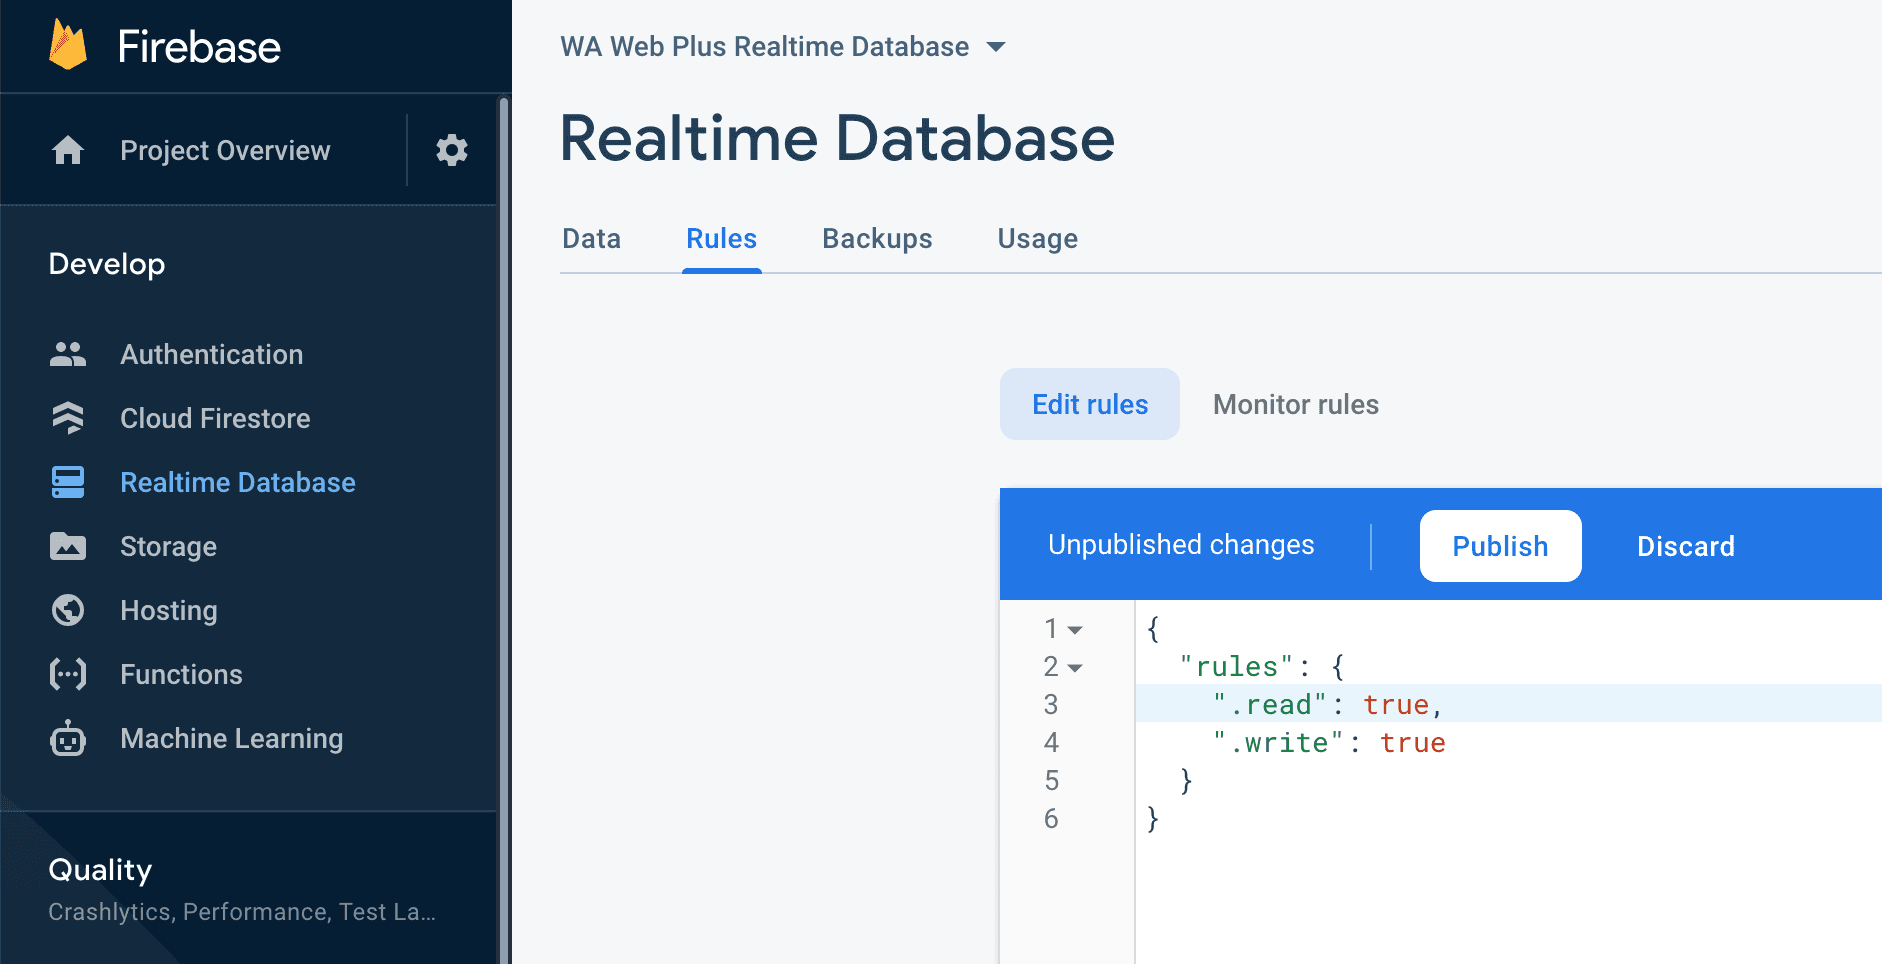
In the “Rules” tab, simply change the “false” values to “true” and hit the “Publish” button.
It’s all set up now, Let’s collect the 3 important pieces of information that WA Web Plus needs to connect to the database. Get your API key first, which is a unique key that tells the database that we’re authorized to access it remotely.
Luckily, Google Cloud Console creates the API Key automatically for you, all you need to do is go and copy it.
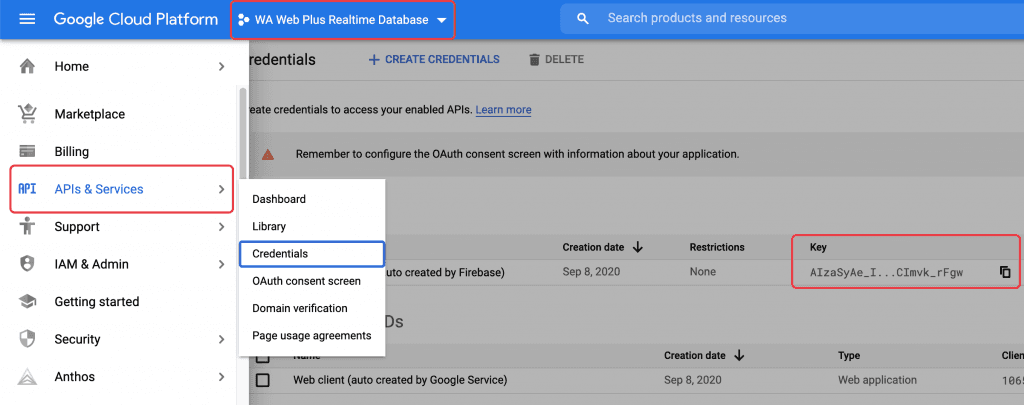
Select the project that we recently created, navigate to “APIs & Services” then go to “Credentials”, you can find an API key that you can easily copy.
The second needed information is the Project ID, click on the Project Settings menu and copy the Project ID.

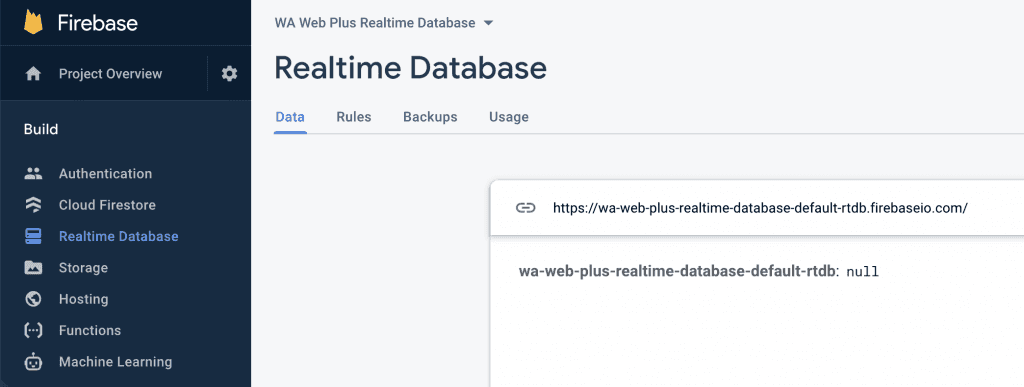
The third and last information you need to get is your Realtime Database URL which is a link that can easily be found in the Realtime Database section in the sidebar.
Now, we have everything we need. Let’s go back to WA Web Plus and fill in all the required information. Go to the Webhooks section and click the “Firebase Settings” button, and copy/paste the required fields.
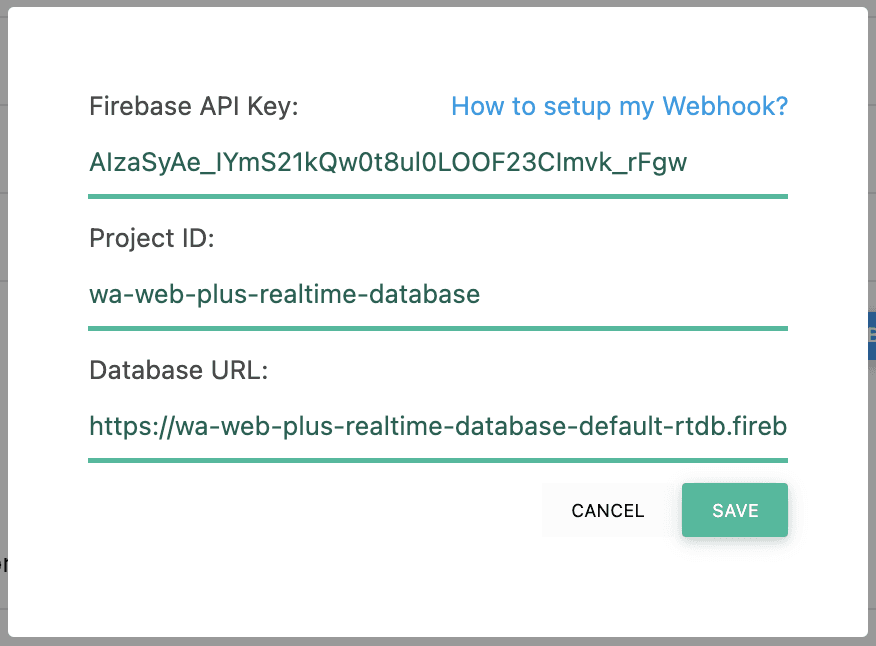
API KEY: AIzaSyAe_IYmS21kQw0t8ul0LOOF23CImvk_rFgw
Project ID: wa-web-plus-realtime-database
Database URL: https://wa-web-plus-realtime-database-default-rtdb.firebaseio.com
Important Note: replace the above Firebase information with your own project information, do not use the same variables that we put up there!
It’s all set up now. However, there is one required field missing, which is the “Data Child Node”, what is that? 🤔
We thought that you might use this Firebase project to manage multiple incoming webhooks, so in order to keep the data tidy and sorted correctly, you can create folders “nodes” inside your database to hold the data of your webhook, every webhook can have one node/folder to process the data inside it.
Add a new incoming Webhook, and put any folder name you want to handle your messages:
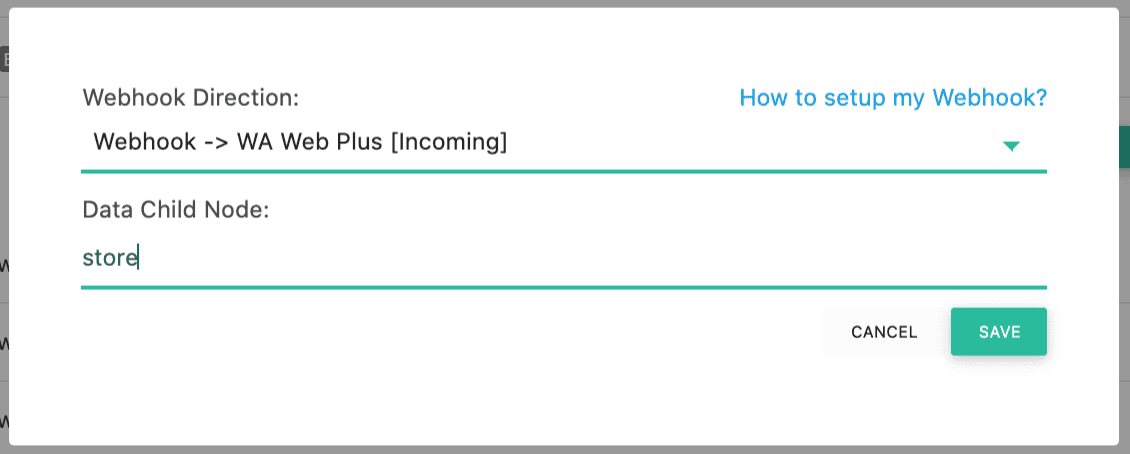
In our case, we will name our folder as “store“, because we will build a webhook that sends a confirmation message to the user WhatsApp account whenever he purchases a product from our store. 😊
Start Receving Incoming Requests
There are a lot of ways that you can send the request to WA Web Plus, you can do it with any automation service, or with your own code (if you’re a developer), or you can even trigger it manually from within your browser. In this example, we will cover sending requests from automation services, such as Pabbly Connect, and it’s good to know that all of the automation services are similar when it comes to sending API requests. We will also cover the custom coding part in case you want to do it manually with your own software.
1- Receiving Request via API URL
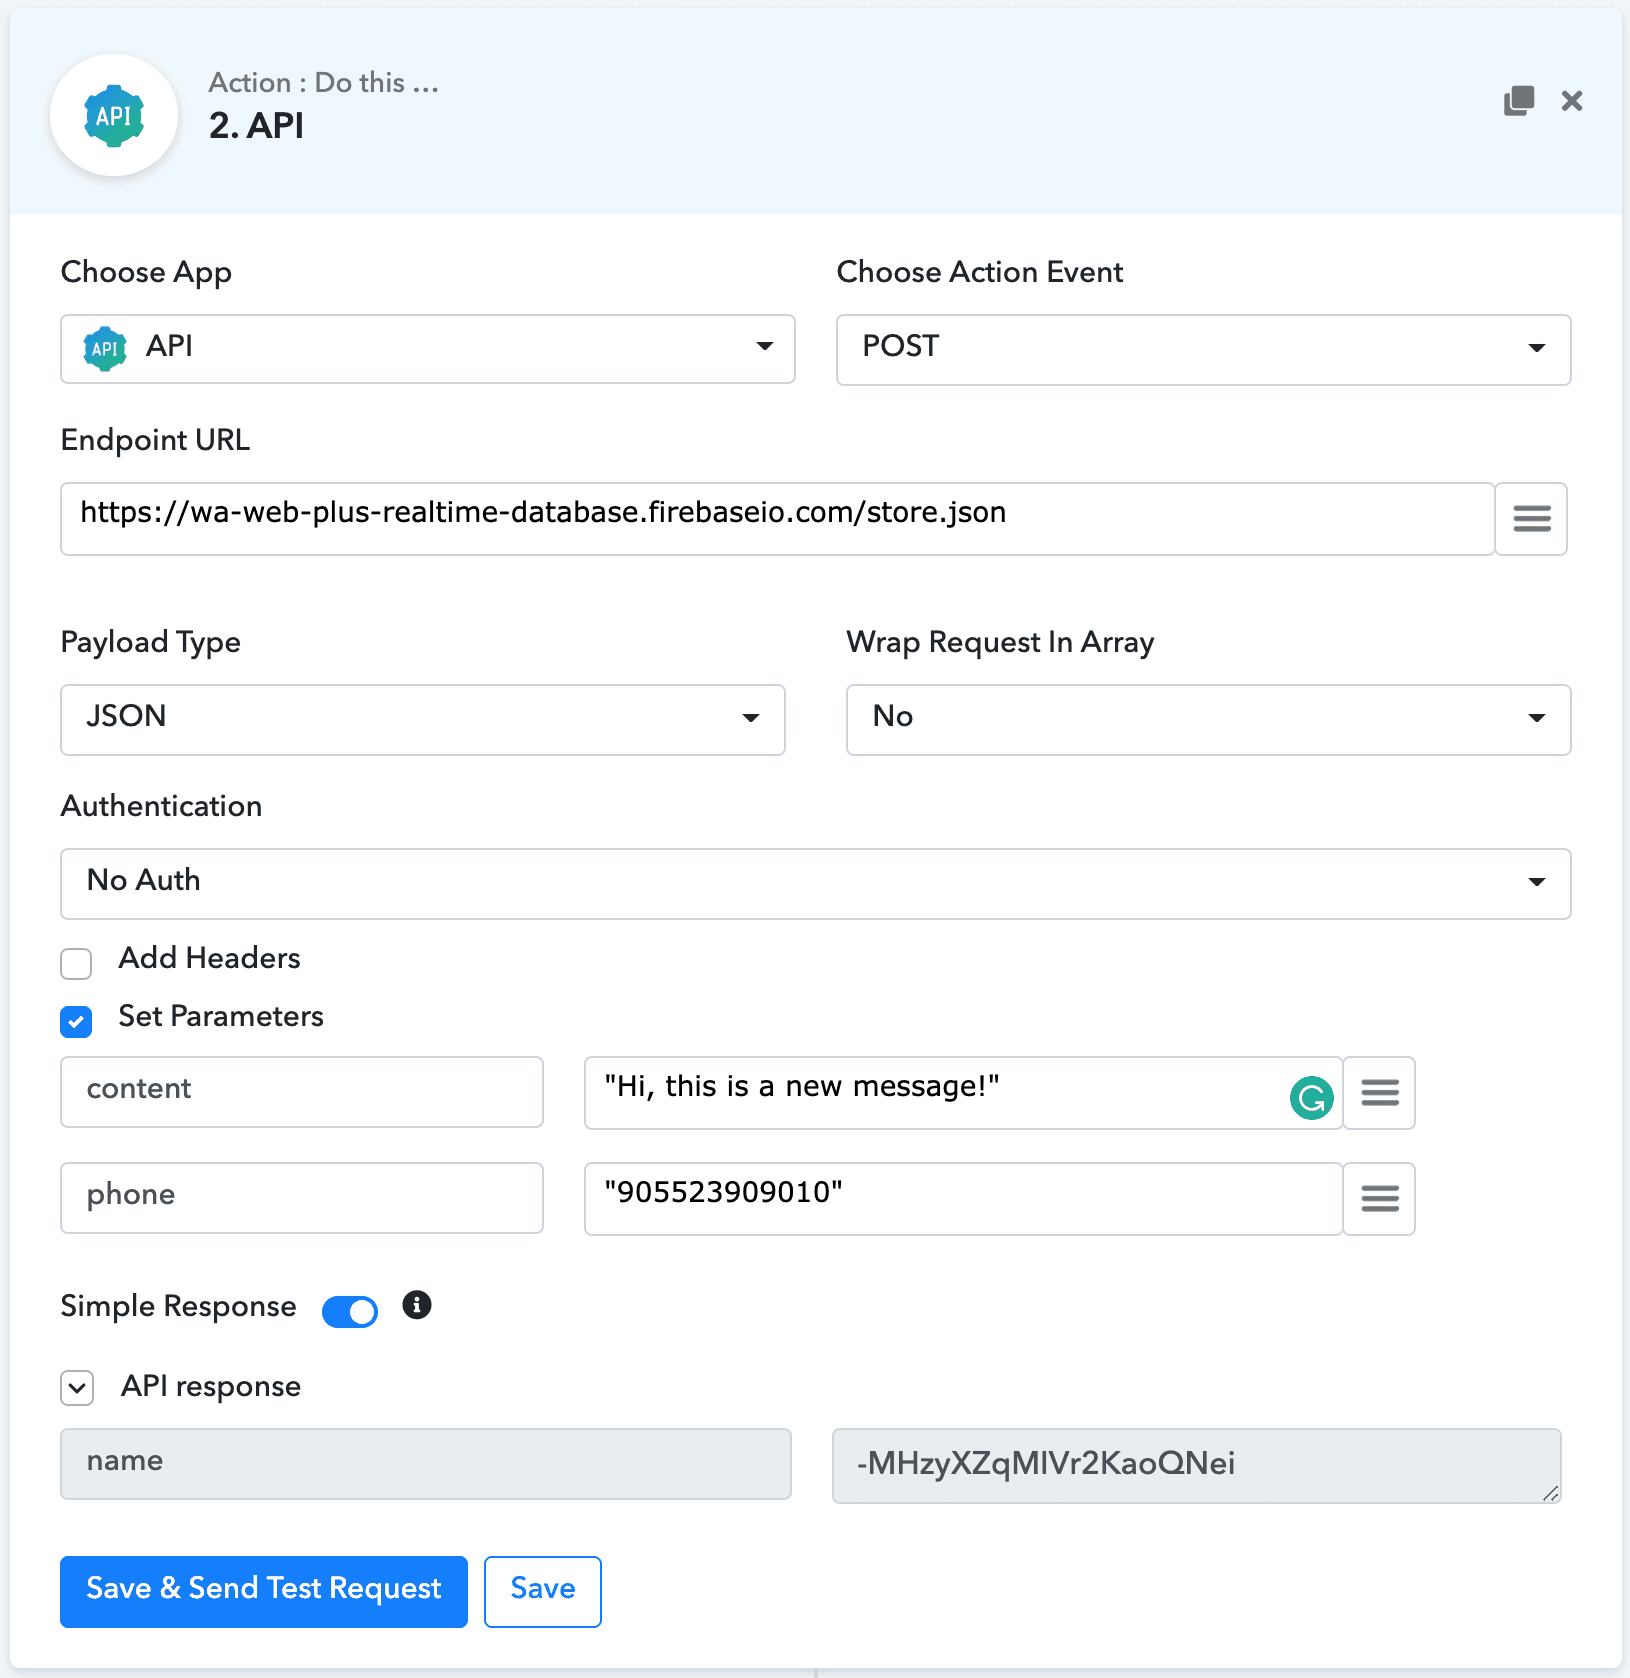
To send a WhatsApp message from outside WhatsApp to somebody, like sending a purchase confirmation message when a user checkout process is completed in your store, or when a form is submitted to your website, you will need to send this request in the following structure:
Endpoint URL: https://{your-database-name}.firebaseio.com/{data child node}.json
Request Parameters: {“phone”: “905366365288”, “content”: “Hi, this is a new message!”}
So, in our case, if you want to send a message to me from outside WhatsApp, your POST request must be sent to this URL:
https://wa-web-plus-realtime-database-default-rtdb.firebaseio.com/store.json
An example with Pabbly Connect is:
Sending Files / Media Messages
To send media files, your image/video/file must be sent in base64 format, change your request parameters to the following structure:
Please note that the base64 string must include your file MIME type. There are thousands of online websites that convert your images/files to base64 format, you can use one of the following services to get the base64 string:
Sending Messages to Groups
To send text or media messages to groups, you need to get the target group ID, starting from WA Web Plus version 4.7.4.5 we included this feature with an option to get the group ID from the “Groups Tools” section.

Copy the group ID and setup your code or request parameters as below:
2- Receiving Request via Native JavaScript API
Useful details about Firebase JavaScript API can be found here. However, you can also use other languages, or use the native libraries for Android and iOS to control requests from within your mobile application.
The simplest code to send the request with JavaScript:


