With WA Web Plus it is now possible to integrate your WhatsApp account with several widely used automation services. In this post, we will cover the integration steps with Pabbly Connect and trigger any custom automated actions you have there.
Log in to your Pabby Connect account at connect.pabbly.com and create a new Workflow and give it a suitable name.
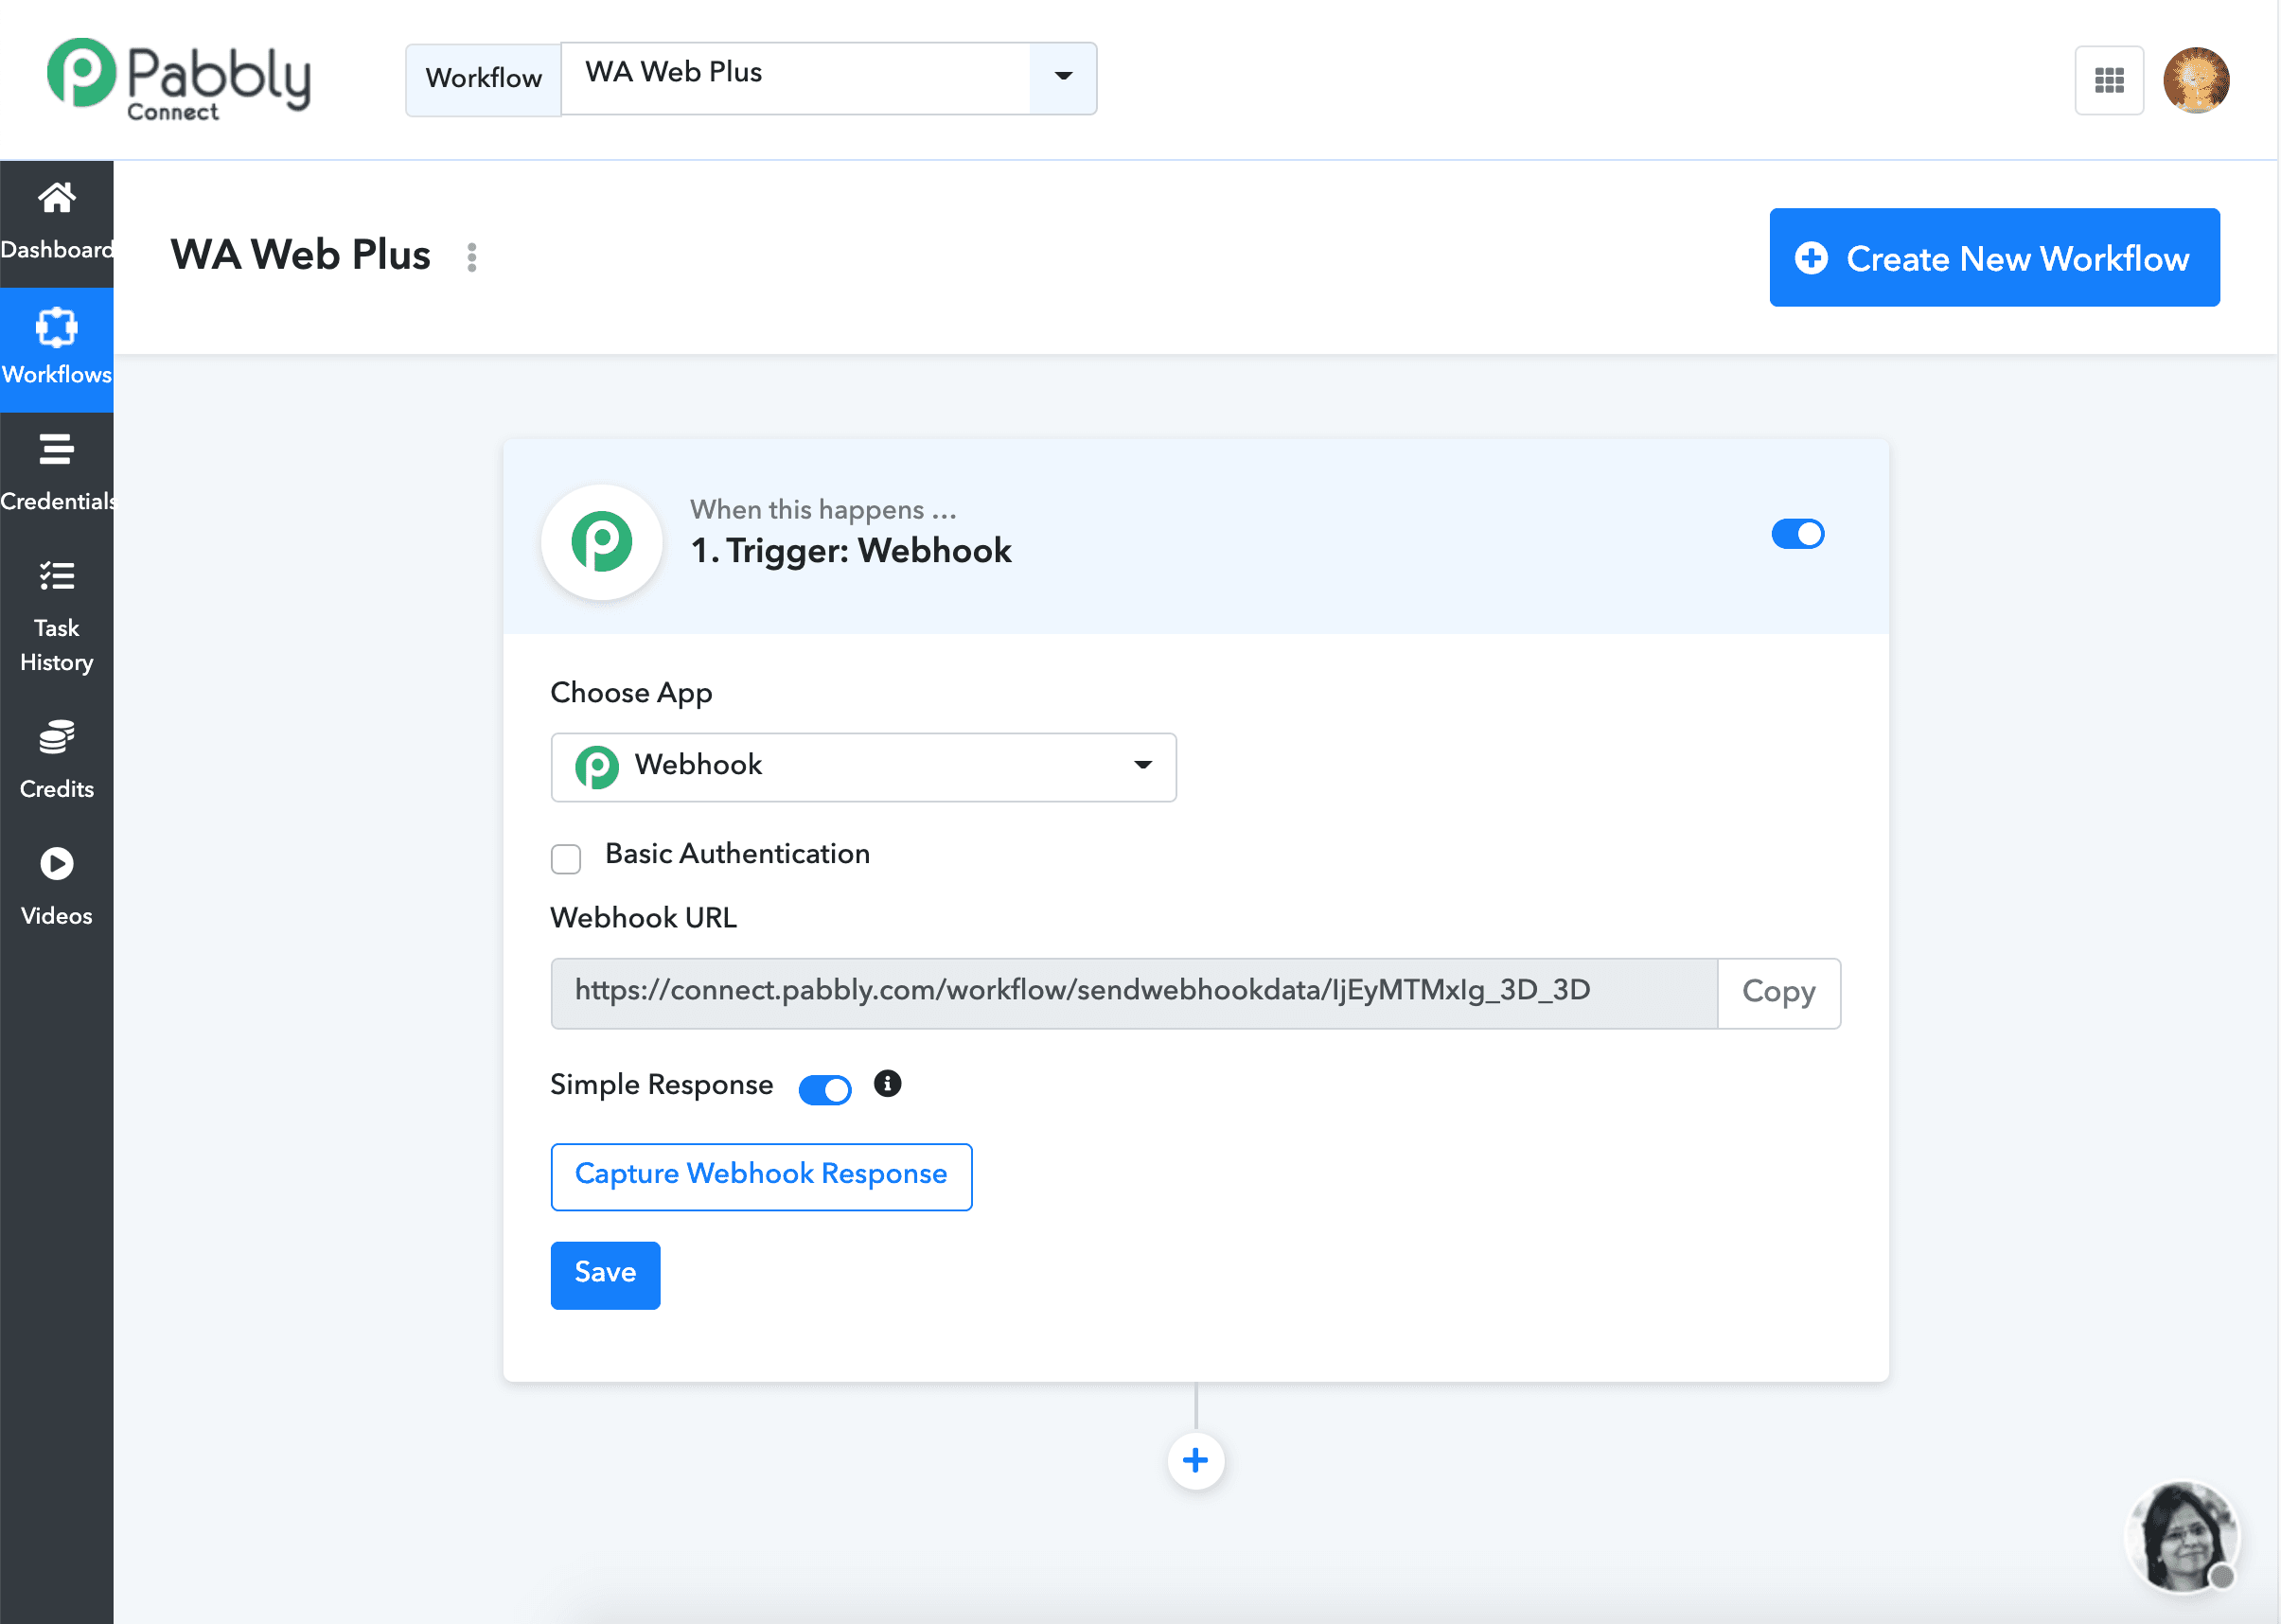
Pabbly offers you a webhook endpoint/URL that it will be listening to all the time, and once a request is received on that webhook endpoint, your custom action will be triggered in Pabbly Connect. Let’s copy that Webhook URL to use it with WA Web Plus, and before you leave the window, click the “Capture Webhook Response” button and let Pabbly wait for our WA Web Plus connection.
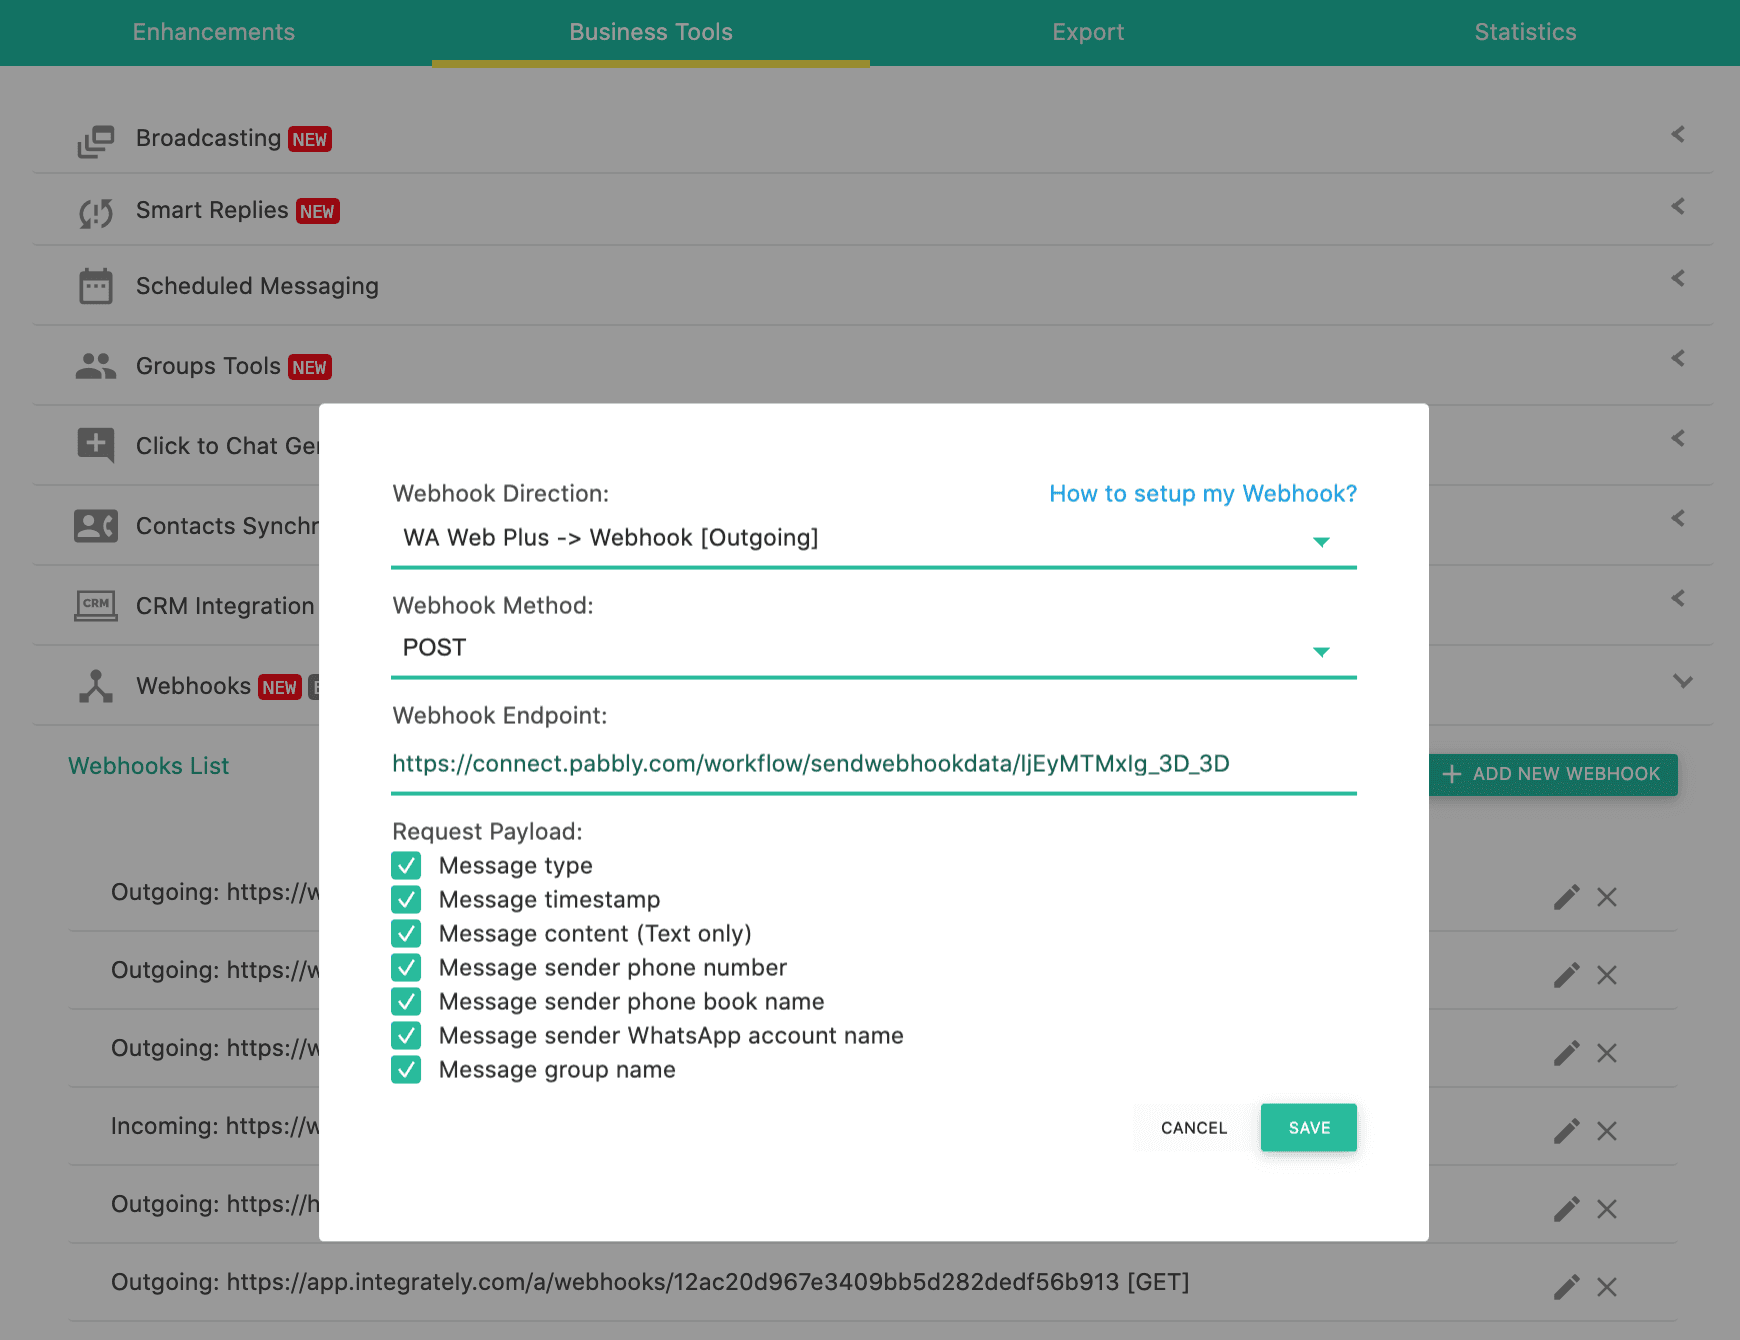
In WA Web Plus, navigate to the Webhooks section in the Business Tools tab, create a new Outgoing Webhook, and paste the previously copied webhook URL in the Webhook Endpoint field, because we will be sending the data outside WA Web Plus towards the Pabbly Connect Webhook.
Now, let’s build a Workflow that collects some leads from your WhatsApp account and saves them into a Google Sheet file whenever someone asks about one of your products.
Go to the Smart Replies section and create a new smart reply with the expected keywords that will collect the leads, set up your smart reply settings to respond with a Webhook, then select the webhook that we created recently for Pabbly Connect.
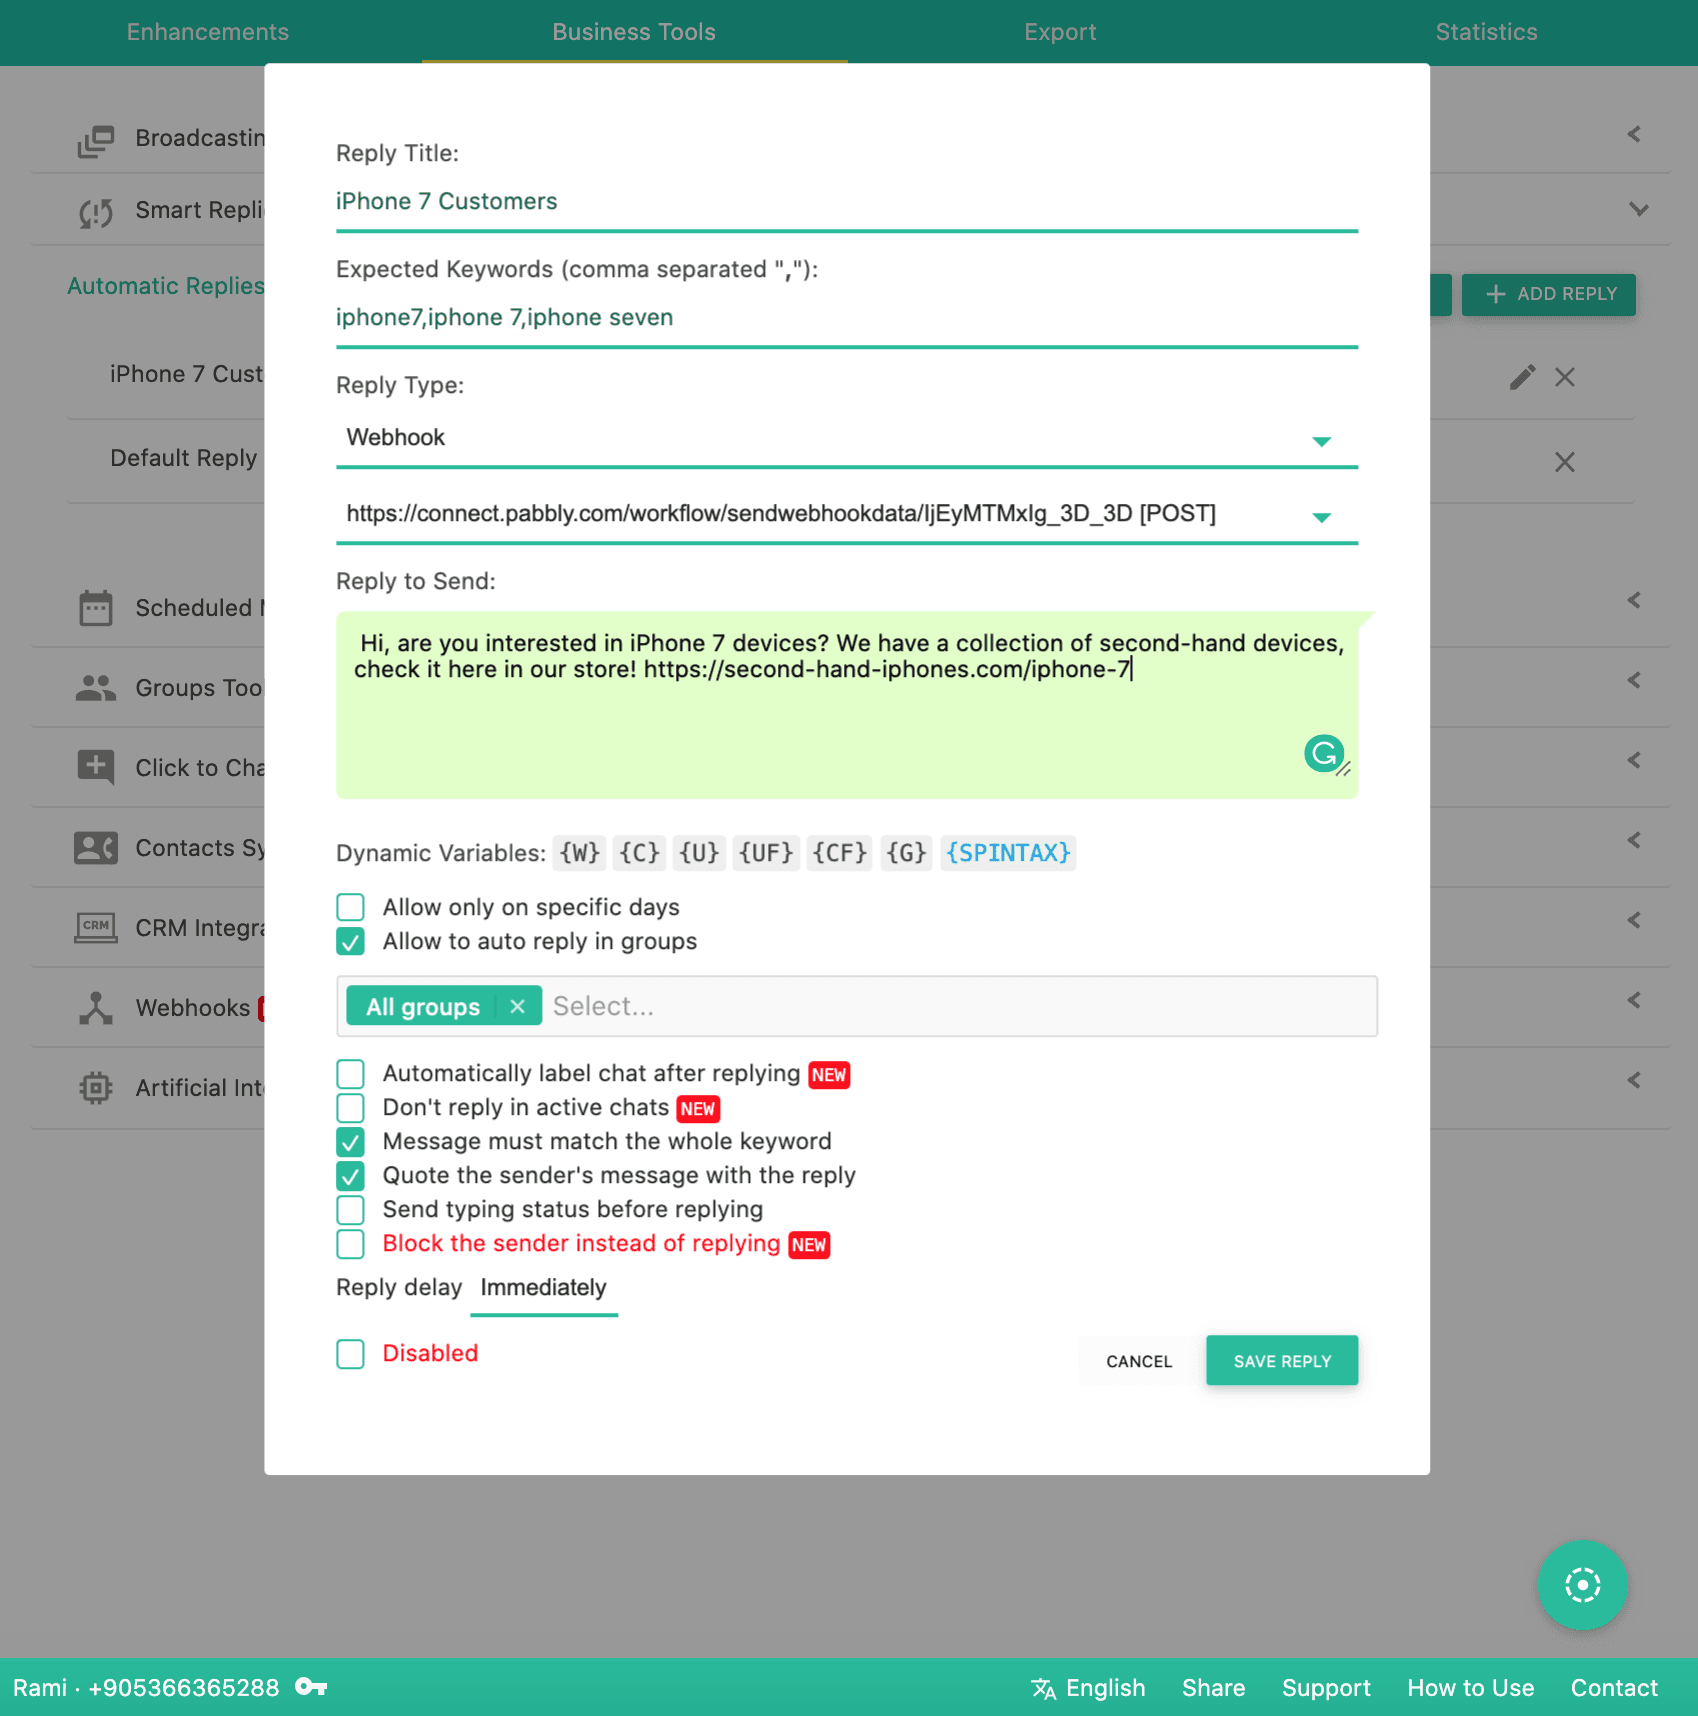
Save your settings, and let's try to trigger this smart reply, since Pabbly Connect is still waiting for us to capture our first webhook response 😴
Try to trigger that smart reply using one of the keywords you set up, do it from another phone or ask someone to send one of the keywords to you (Yeah, sounds a hacky way to do it, and we will add a manual trigger very soon) but for now, we can’t leave Pabbly wait anymore, check what happens when your smart reply is triggered!
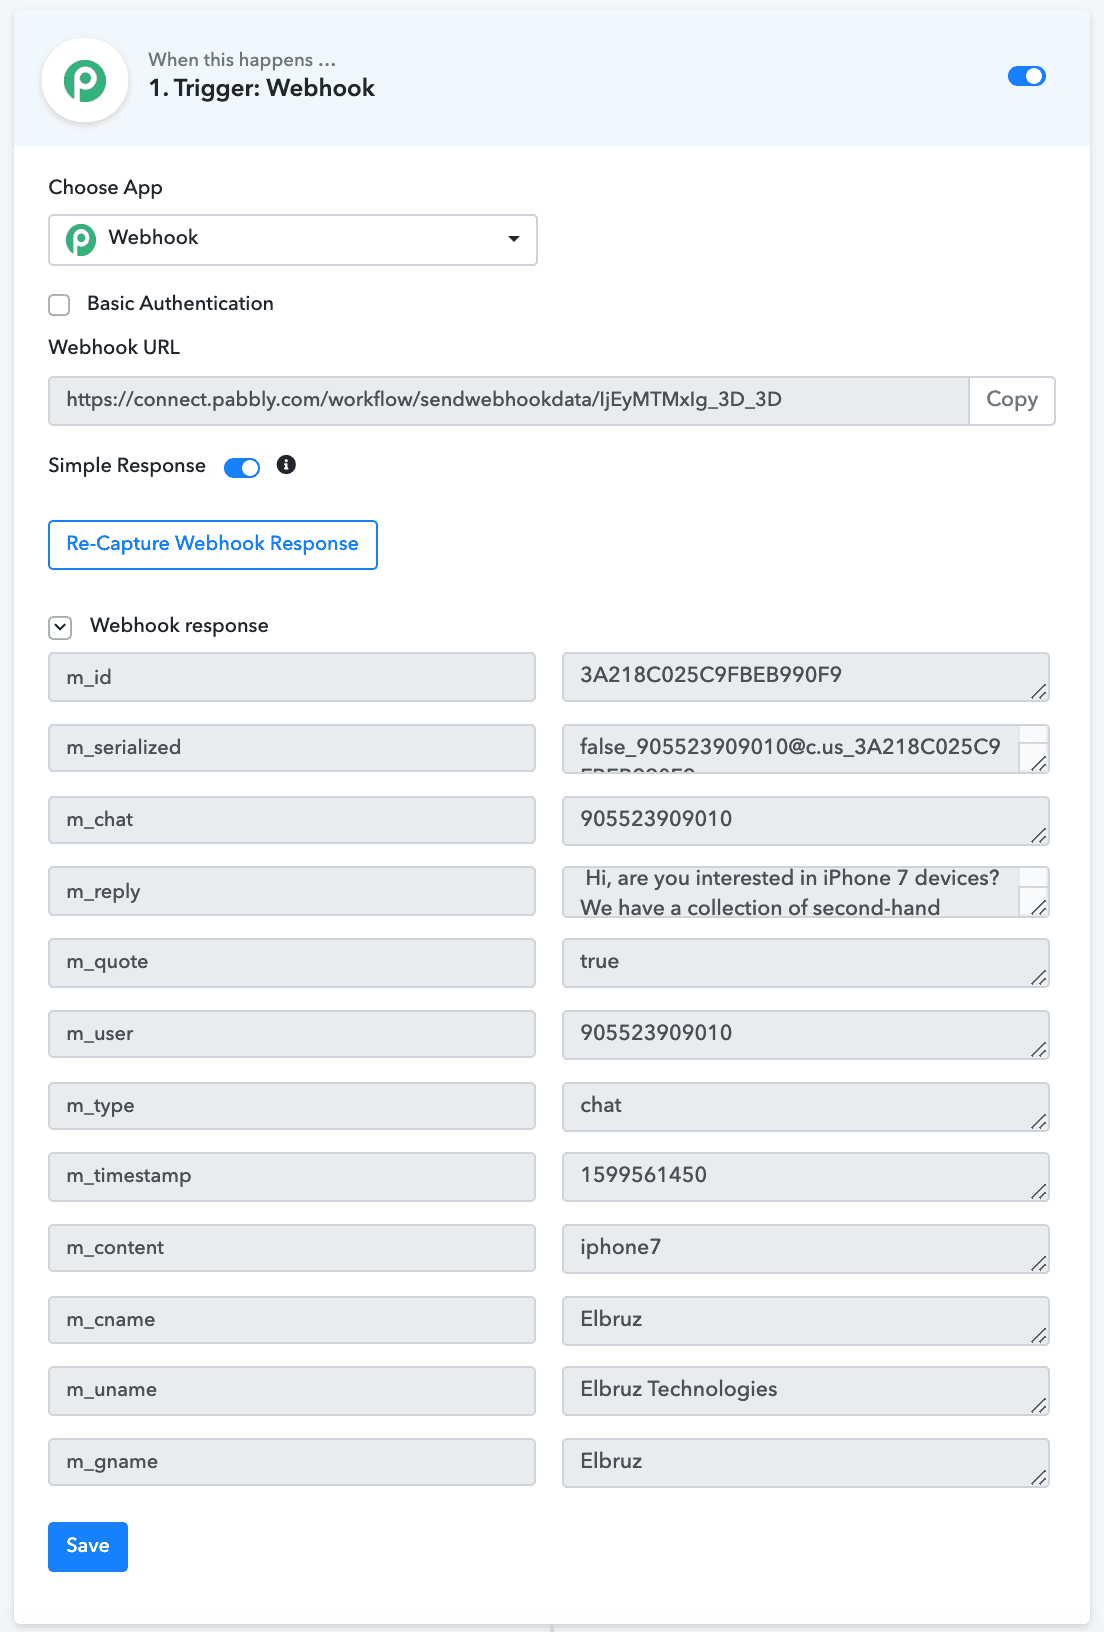
Pabbly Connect was successfully able to capture the data that was sent to the webhook URL! Now, we will be able to do whatever we need with this data, choosing from hundreds of services that Pabbly Connect can integrate with. Don’t forget to click the “Save” button before we proceed!
Since we will collect leads, integrating with Google Sheets sounds the best, so let's lick the little blue plus + icon that stands below the webhook section, and choose “Google Sheet” as the app that will be receiving this data.
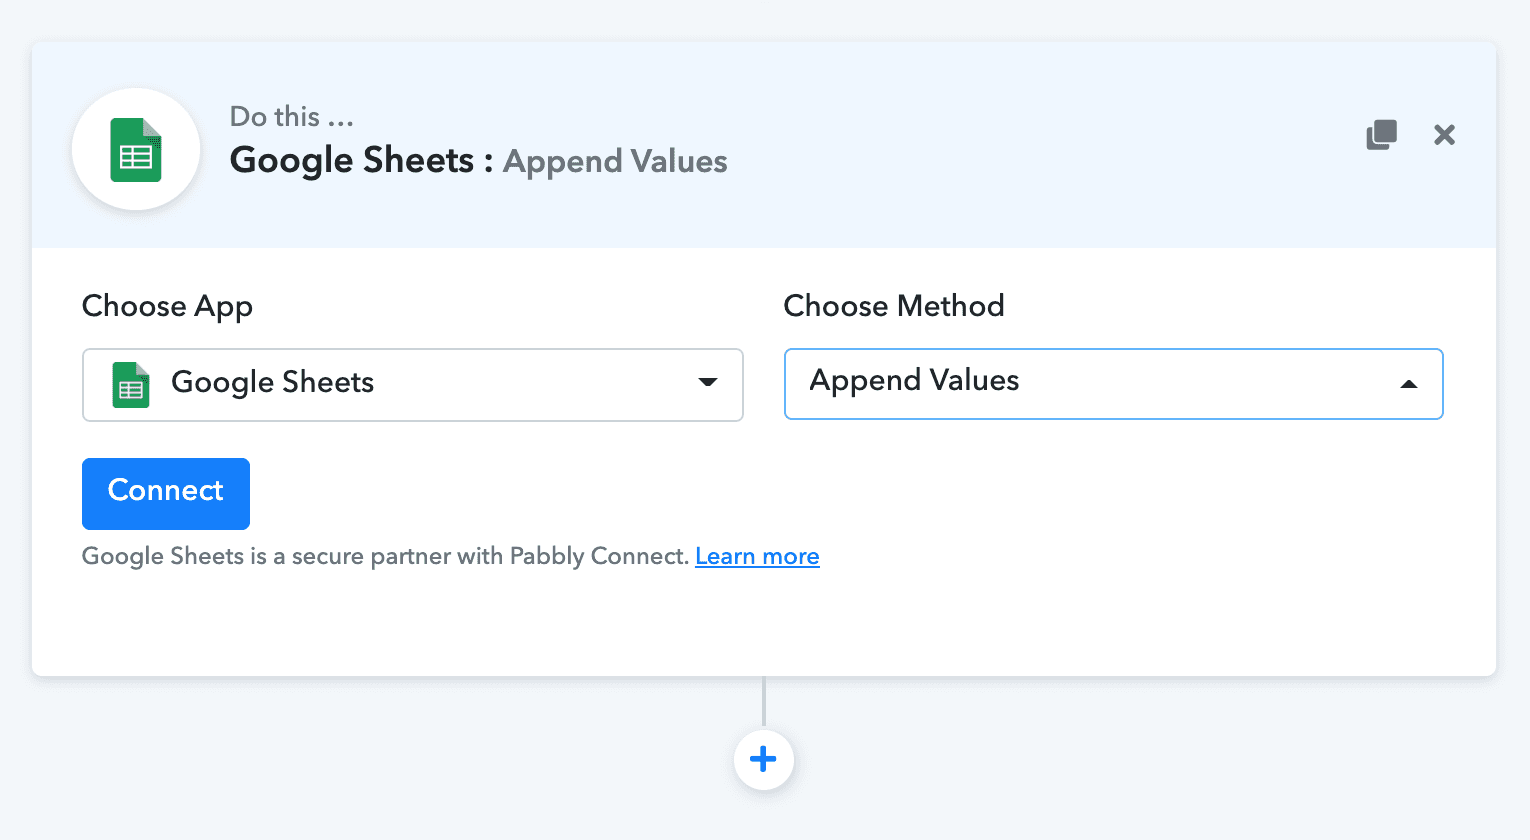
Choose the method “Append Values”, and hit the Connect button, then follow the authorization window, once done, you will be able to choose which Google Sheet file you want to save your leads information to it.
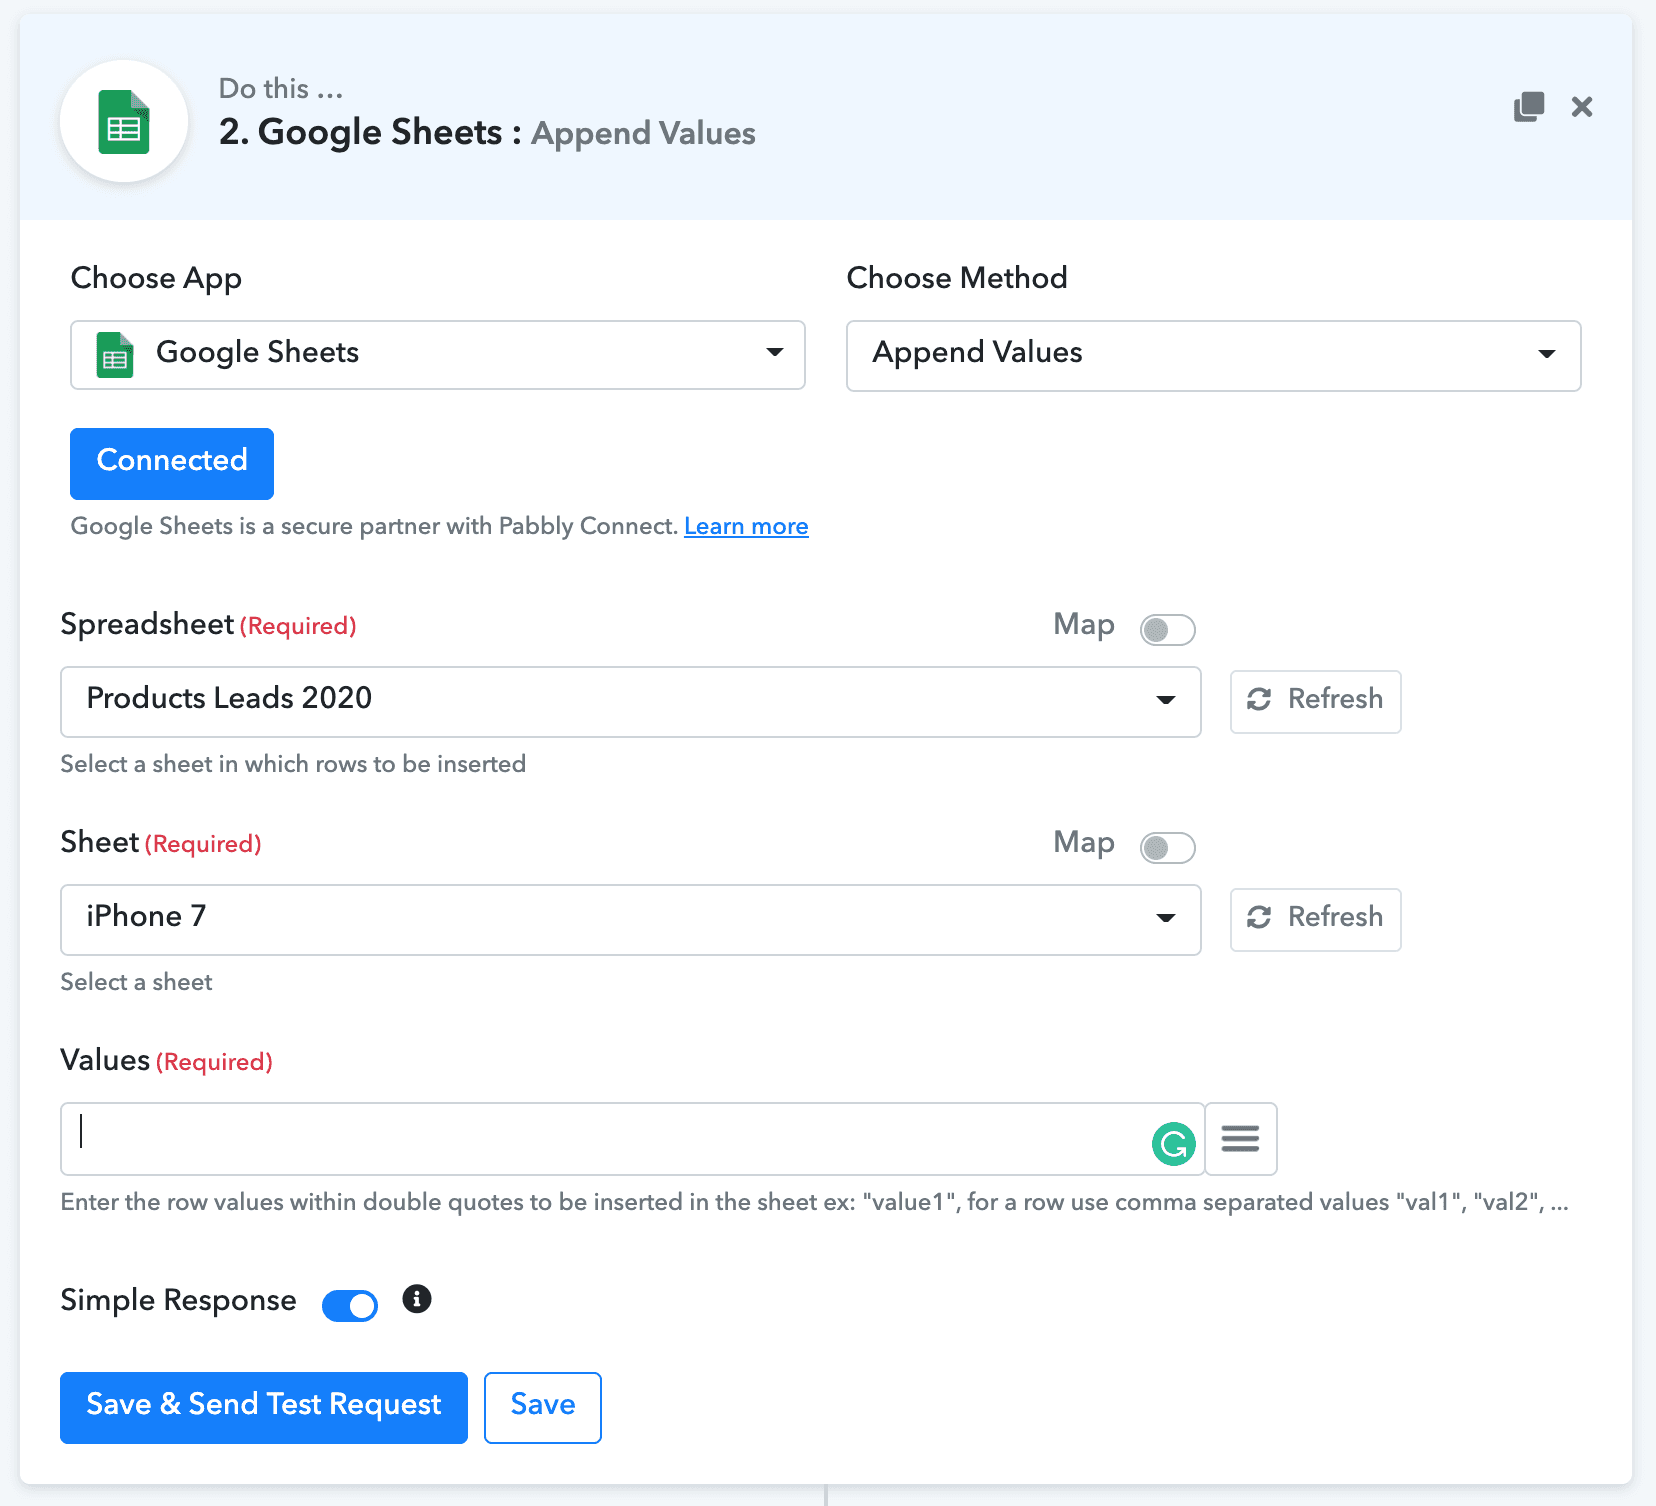
We’re almost there! We just need to teach Pabbly which columns in our Google Sheets file will handle our data. This is what my testable Google Sheets file looks like:
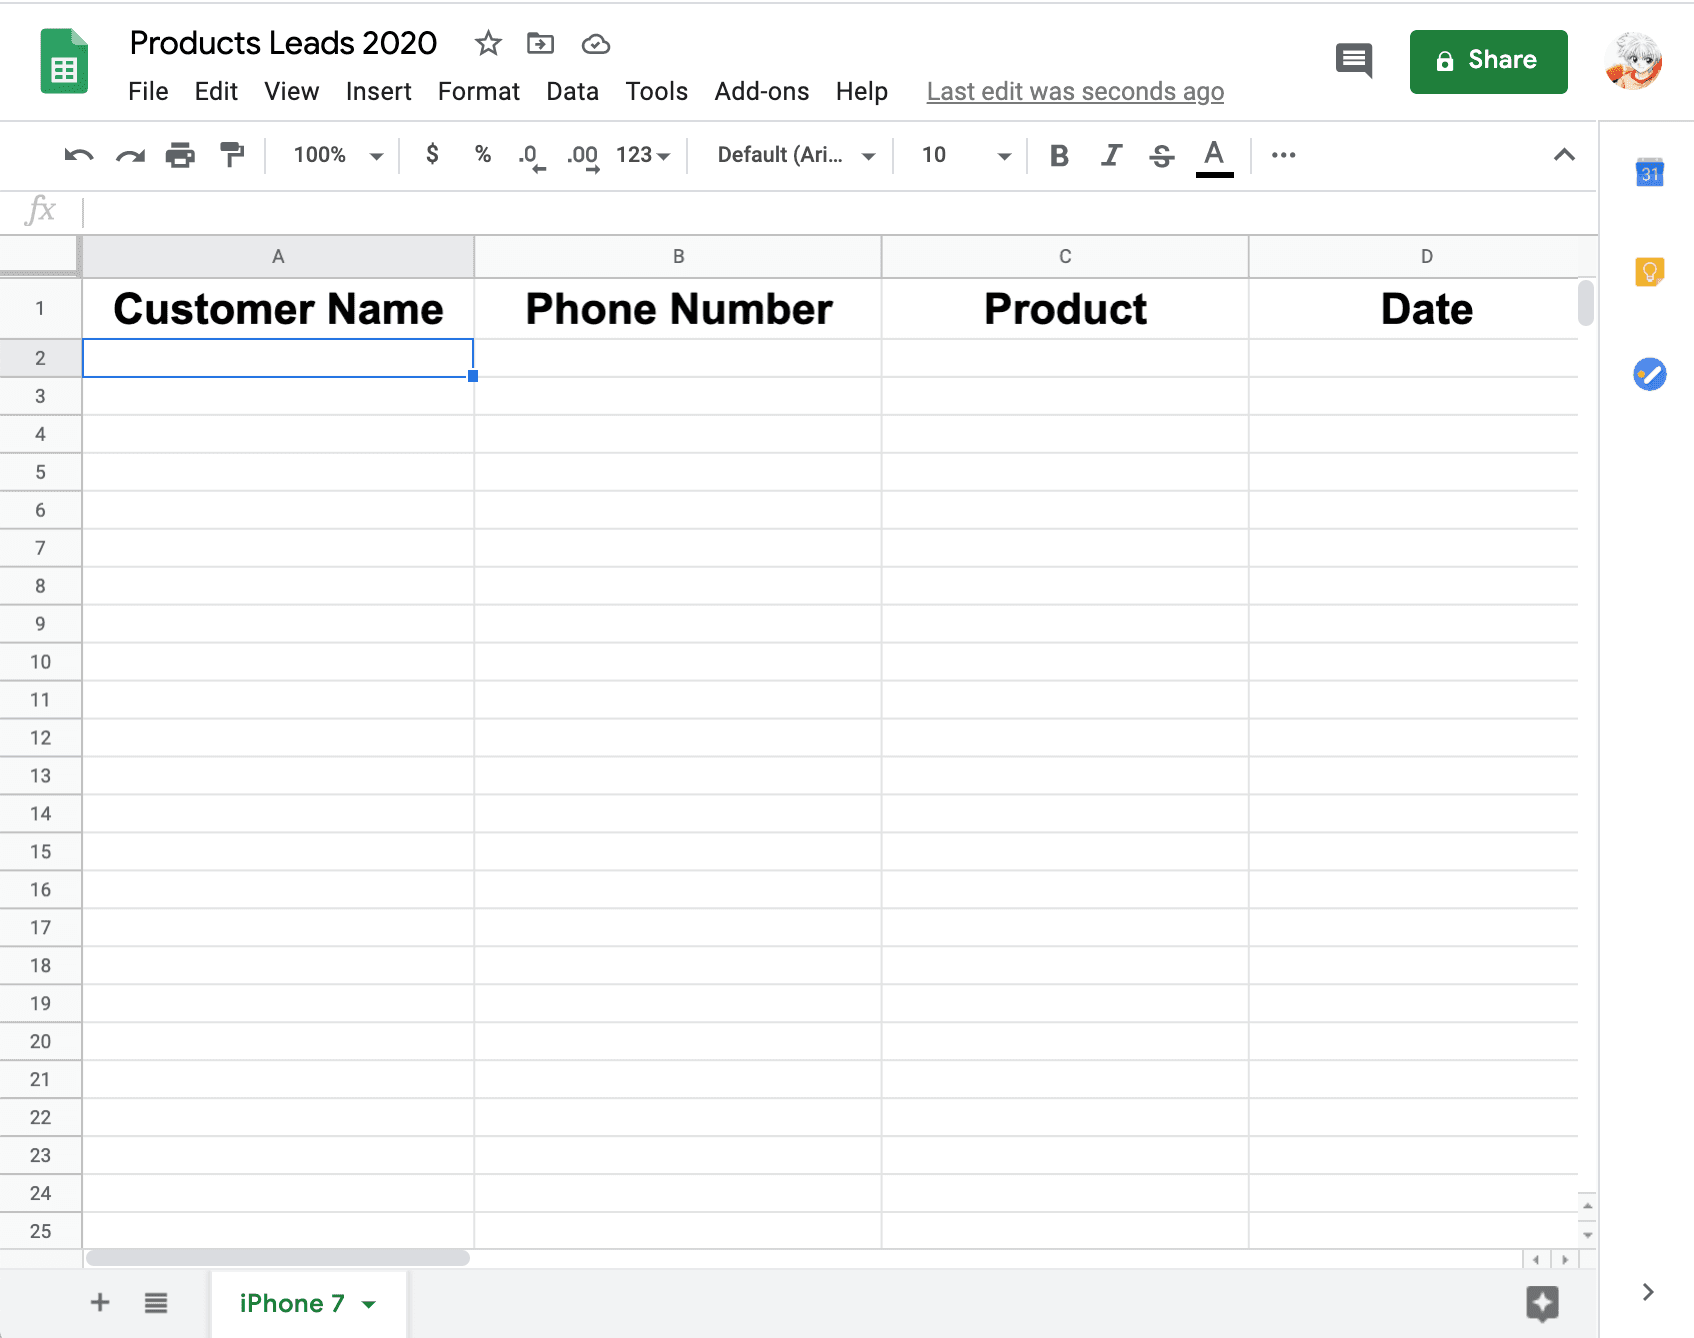
As Pabbly Connect advises, we will fill the “Values” input box in the order of our Sheet’s columns, and within double quotes.
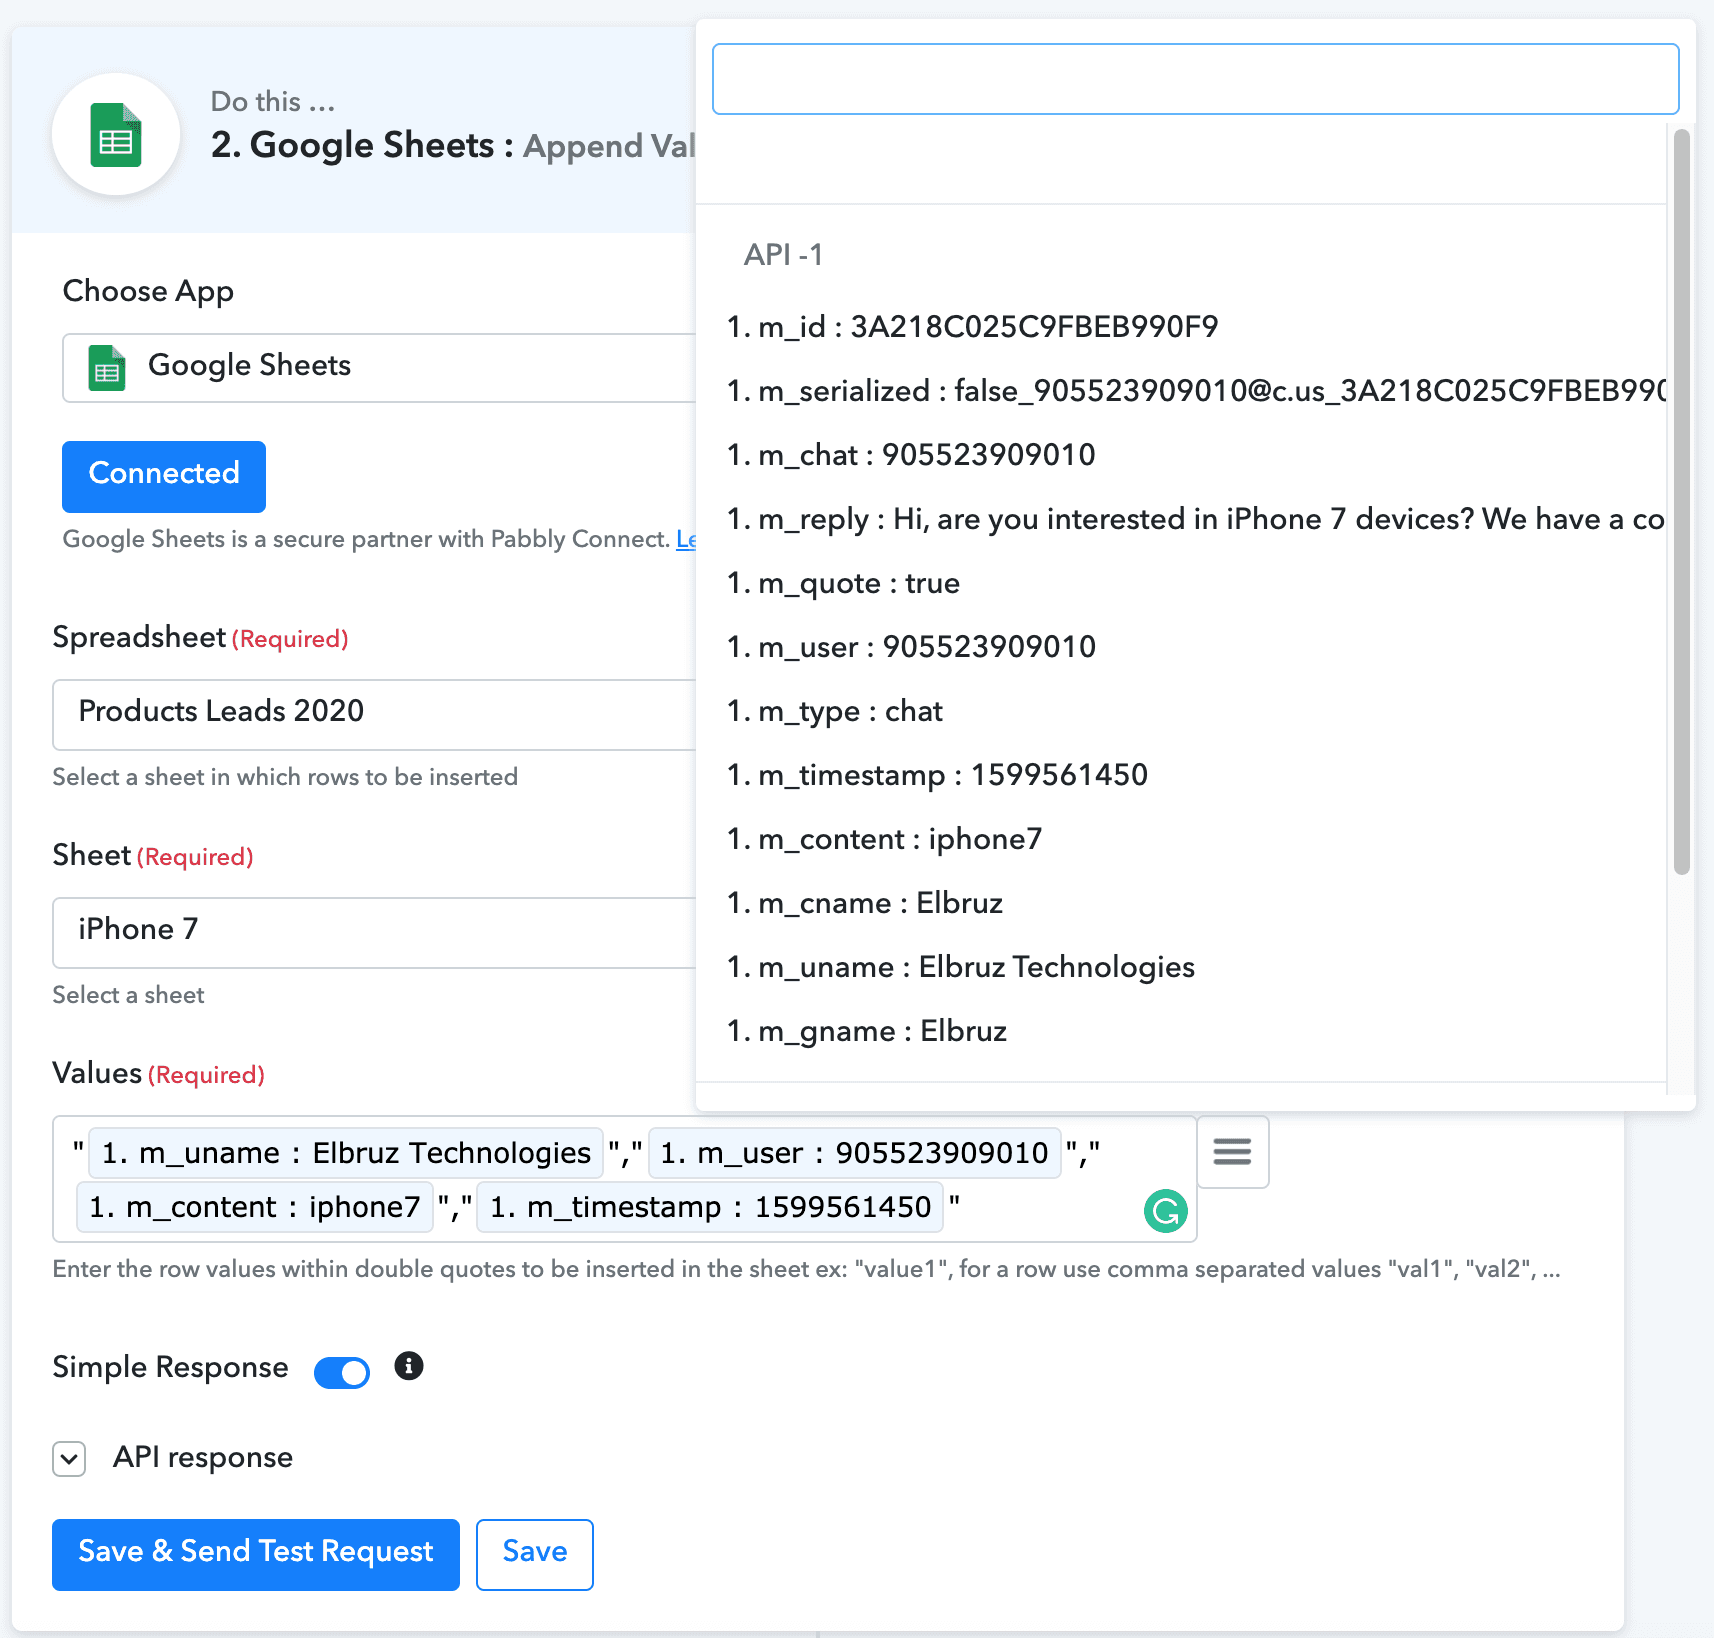
The awesome mapper helps you to use the data we captured from our first Smart Reply request, and map it into your Google Sheets columns.
Click “Save & Send Test Request”, then check what happens within your Sheet!

As you can see in the above image, we’ve successfully connected WhatsApp with Google Sheets using WA Web Plus and Pabbly Connect. No more configurations are needed, this Sheet will be filled automatically once a smart reply is triggered in WA Web Plus, isn’t that awesome?!
We’re looking forward to seeing what awesome integrations you will be building next!


