
Rami
Editor
WA Web Plus helps you schedule a broadcasting campaign to run at a specific date and time, this feature helps you rest well while WA Web Plus is taking care of sending your messages to customers at the right time!
To set up a scheduled action, open WA Web Plus, navigate to the “Business Tools” tab, then the “Scheduled Messaging” sub-tab, and click “Add Scheduled Action”.
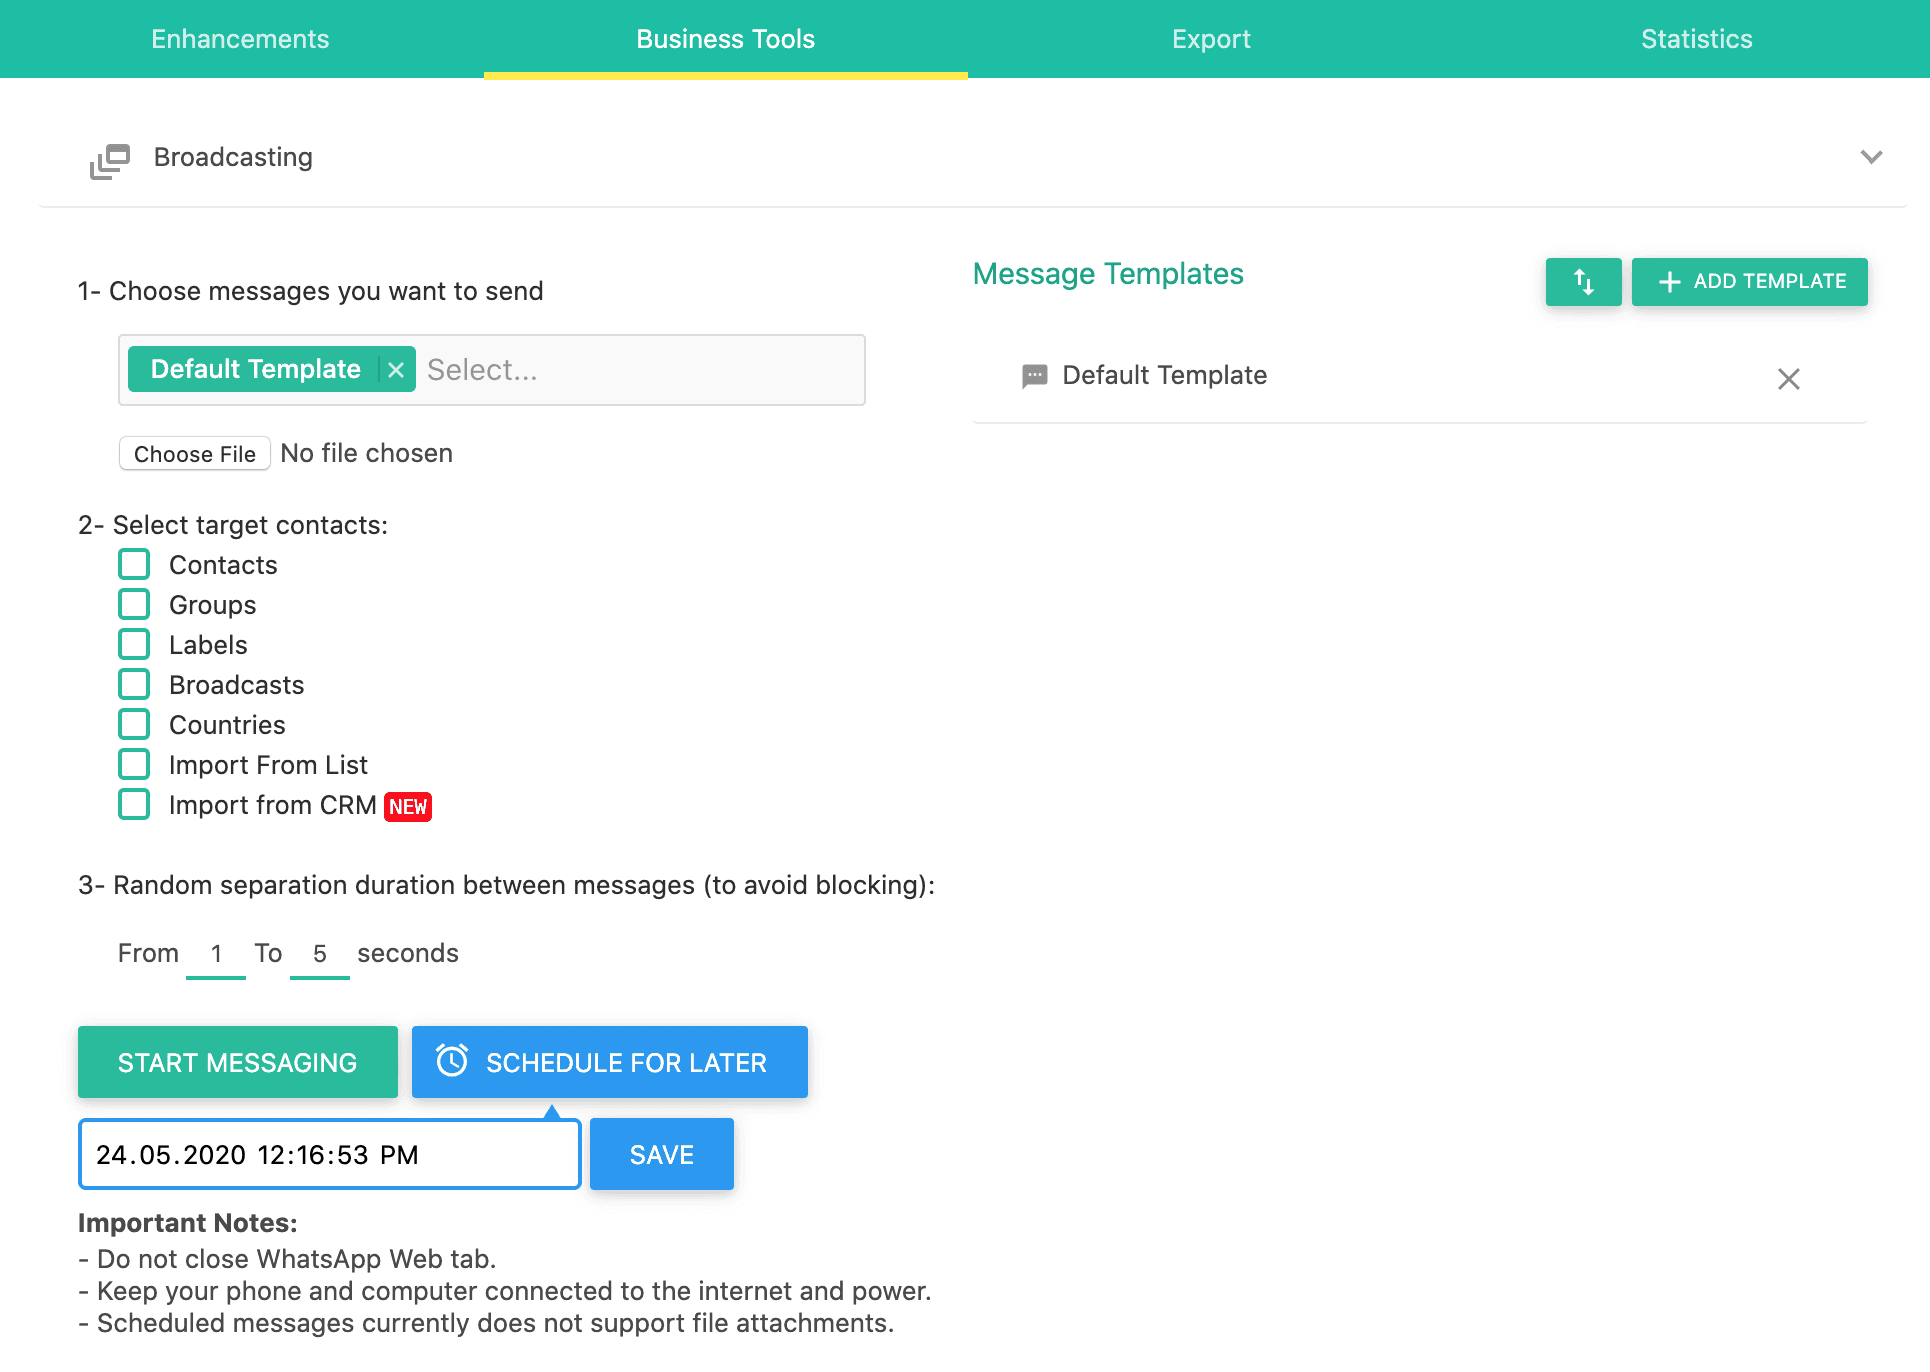
Setup your broadcasting process as explained in this article, and click “SCHEDULE FOR LATER”, choose the date and time that you wish the scheduled messaging process to start, then click “SAVE”, a popup will open asking you to set a friendly name to your scheduled action so that you can remember it easily.
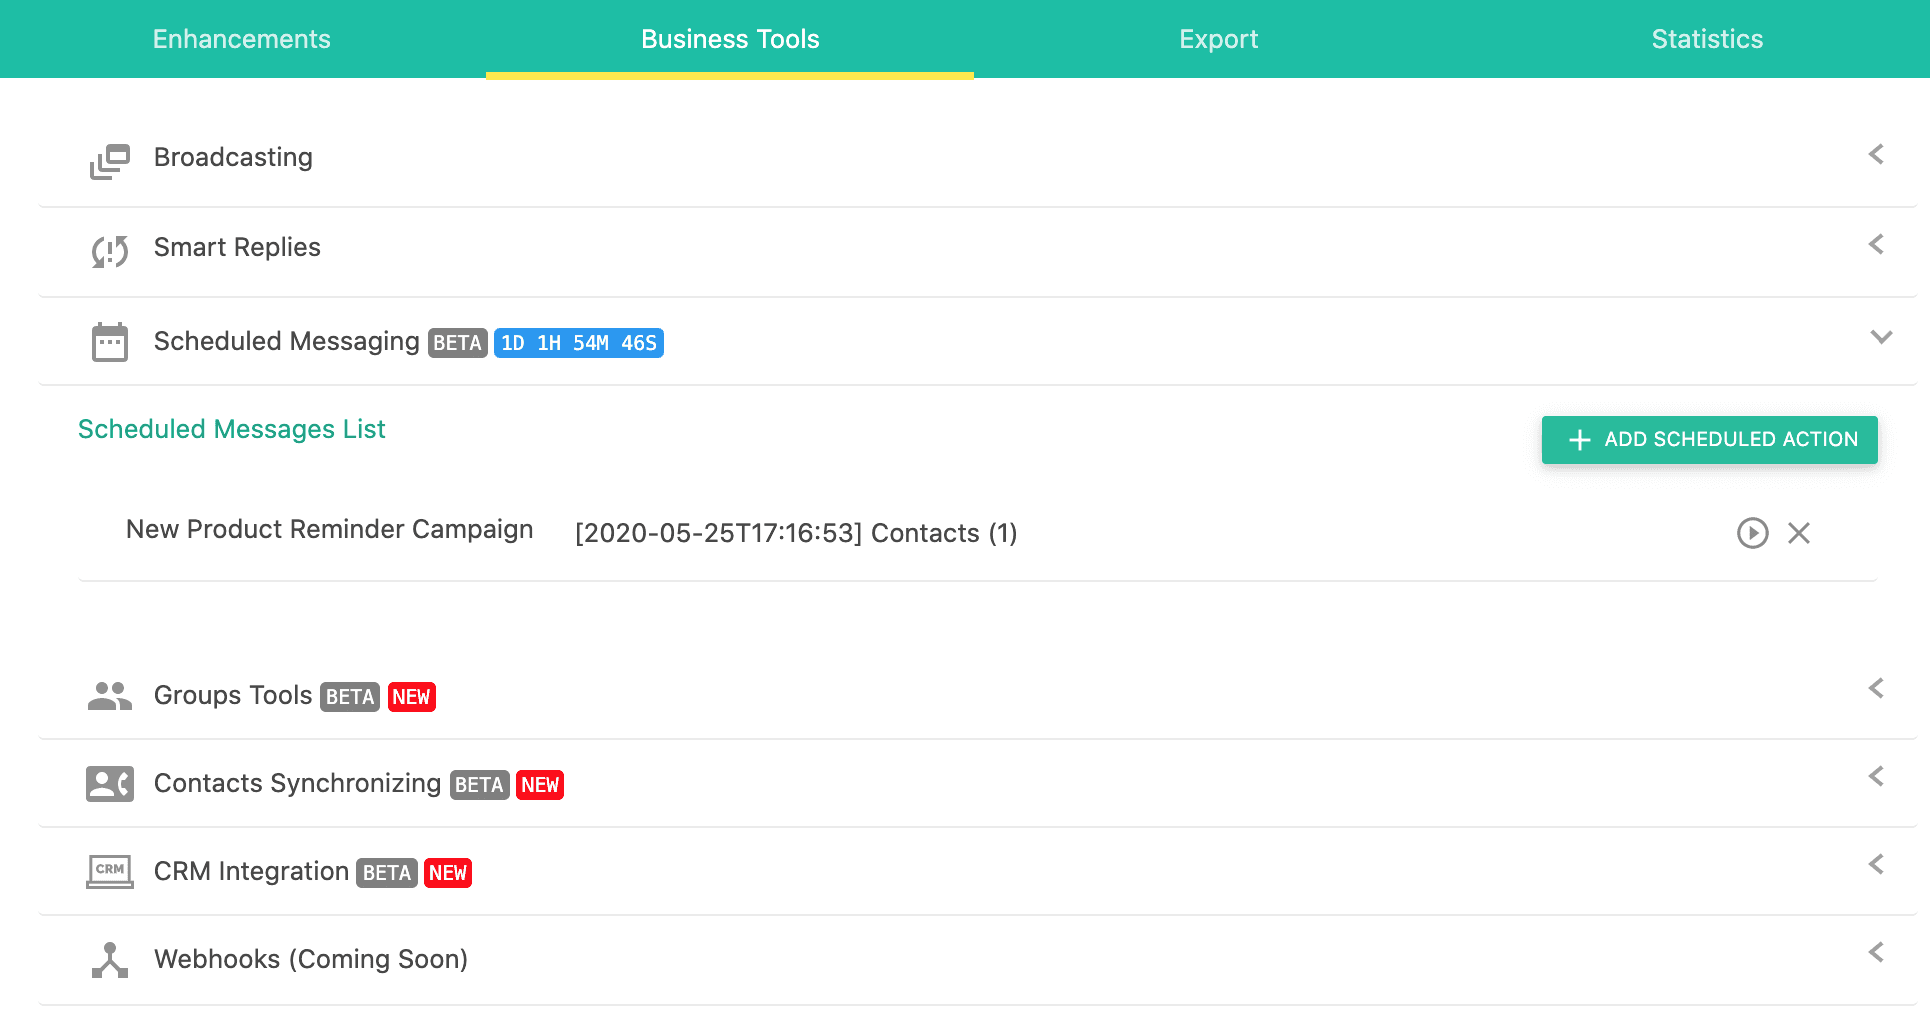
After saving it, the scheduled action will appear on the list, allowing you to delete it, or running it immediately.
Once the scheduled date/time comes, WA Web Plus will automatically start the messaging process on your behalf.
A few notes to keep in mind when using this feature:
1- You should not close WhatsApp Web on your computer, otherwise WA Web Plus will not be able to detect the scheduled action and process it.
2- It’s necessary to keep your phone connected to the internet and charged with enough battery power.
3- Currently, the scheduled messaging feature does not support file attachments, but we are working to improve it very soon.


